Setup Single-Sign On for dab Nexus Managed App
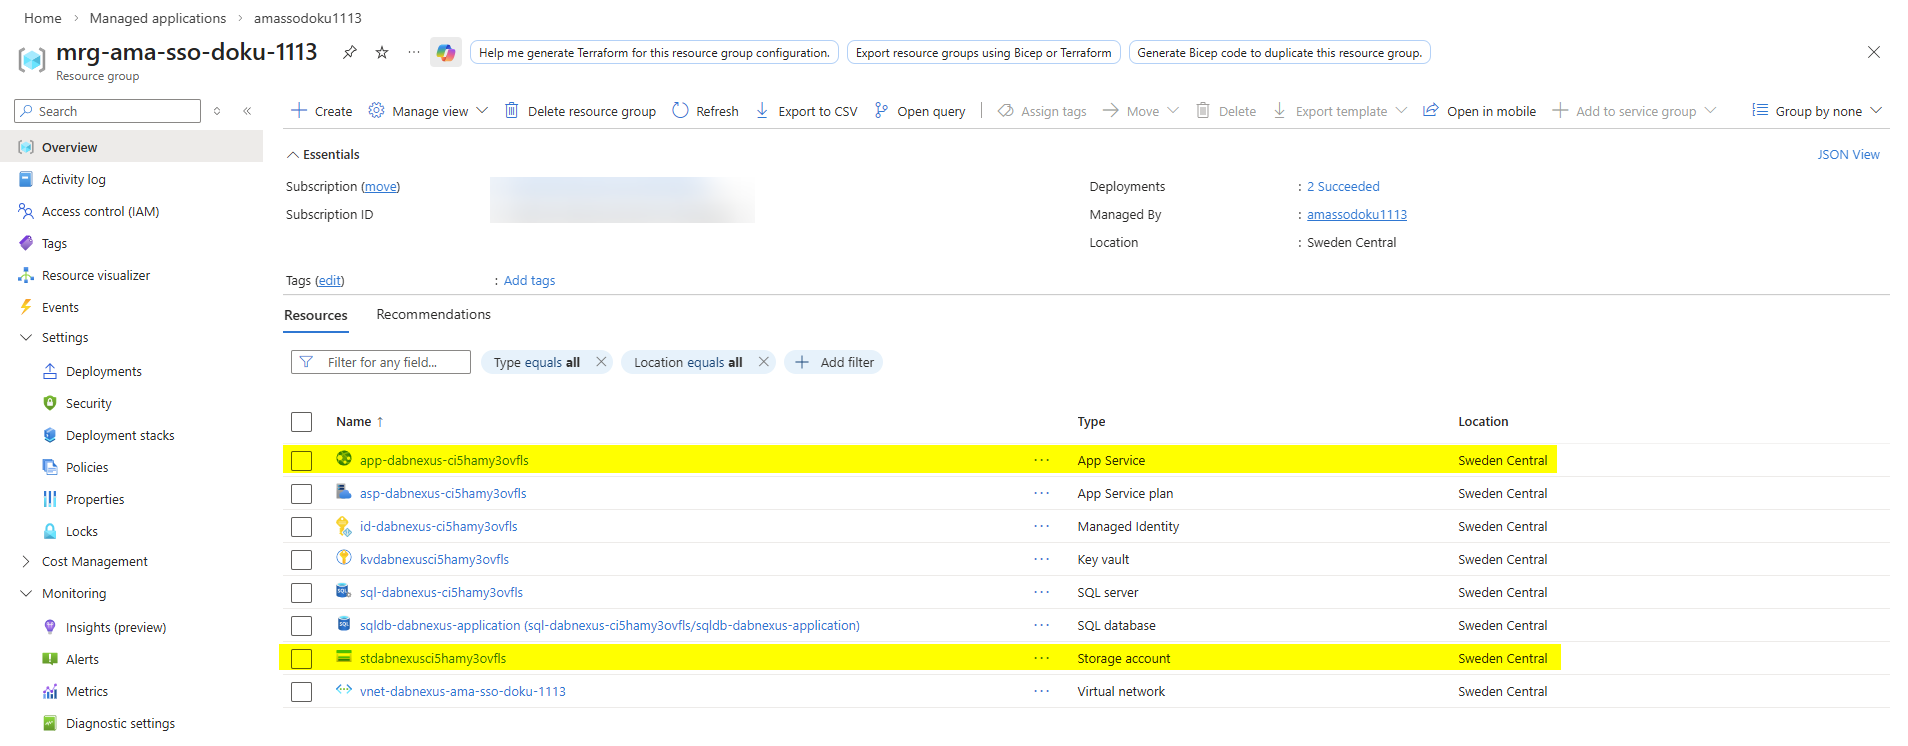
Before starting, find your Managed App's managed resource group in the Azure Portal.
There's a link to it in the top-right corner of the Managed Application overview page. The managed resource group contains, among other things, an App Service and a Storage Account, both of which you'll need to make changes to later.

-
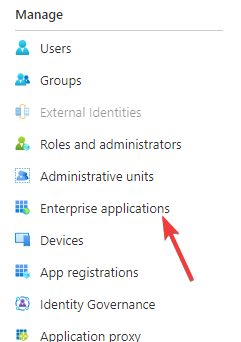
Open the Microsoft Entra ID Menu in the Azure Portal

-
Click on Enterprise applications
-
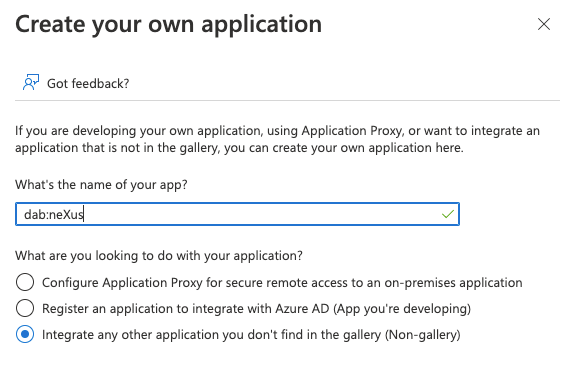
Chose New Application and then Create your own Application
-
Insert a name such as dab Nexus and activate the Checkbox Integrate any other application you don't find in the gallery (Non-gallery)
-
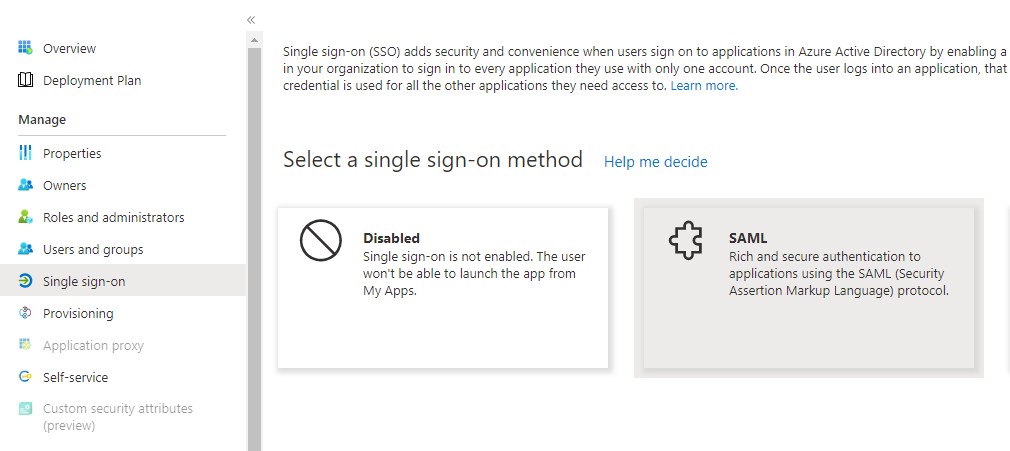
Click on Single Sign-On and then on SAML as SSO-Method
-
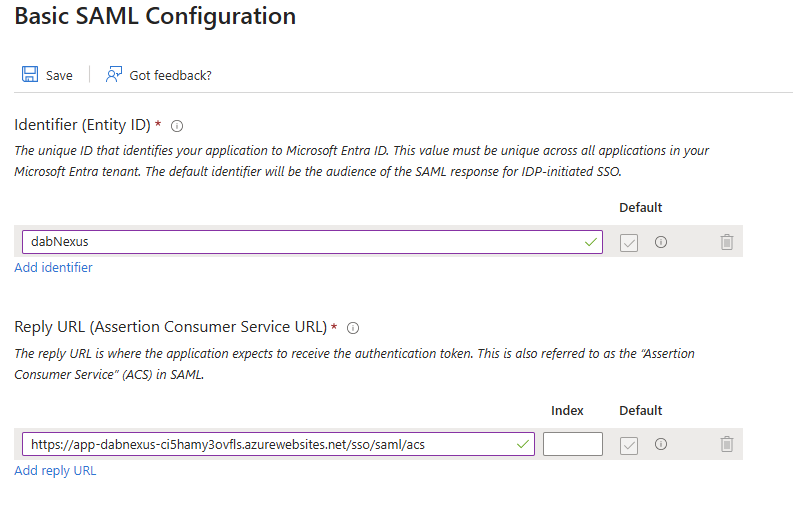
Click in the Basic SAML Configuration tab on Edit
-
Enter an Identifier, e.g. dabNexus, and a Reply URL. This Reply URL is the URL of your dab Nexus App Service, with
/sso/saml/acsappended at the end
-
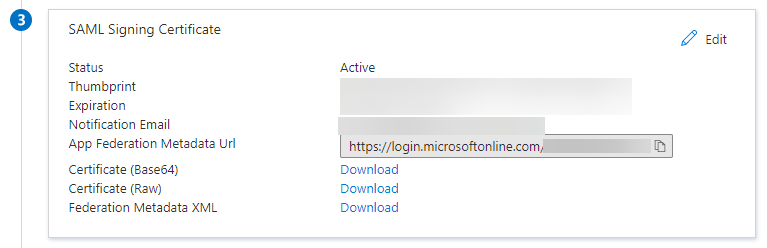
Download the Base64 certificate from the SAML Signing Certificate section, you'll need it later
-
Copy the App Federation Metadata Url from the same section, you'll need it later
-
Upload the Base64 certificate file to the share-dabnexus-home file share in the storage account and put it into the AdditionalCertificateAuthorities directory.
-
Make sure the file has the .crt extension and that its name only contains lowercase letters (e.g. idp.crt).

Add three new environment variables to the App Service:
| Name | Value |
|---|---|
| DABNEXUS_AuthMode | SAML |
| DABNEXUS_SAML__Issuer | The identifier you chose in Microsoft Entra ID earlier |
| DABNEXUS_SAML__IdentityProviderMetadataUrl | The App Federation Metadata Url you copied from Microsoft Entra ID earlier |
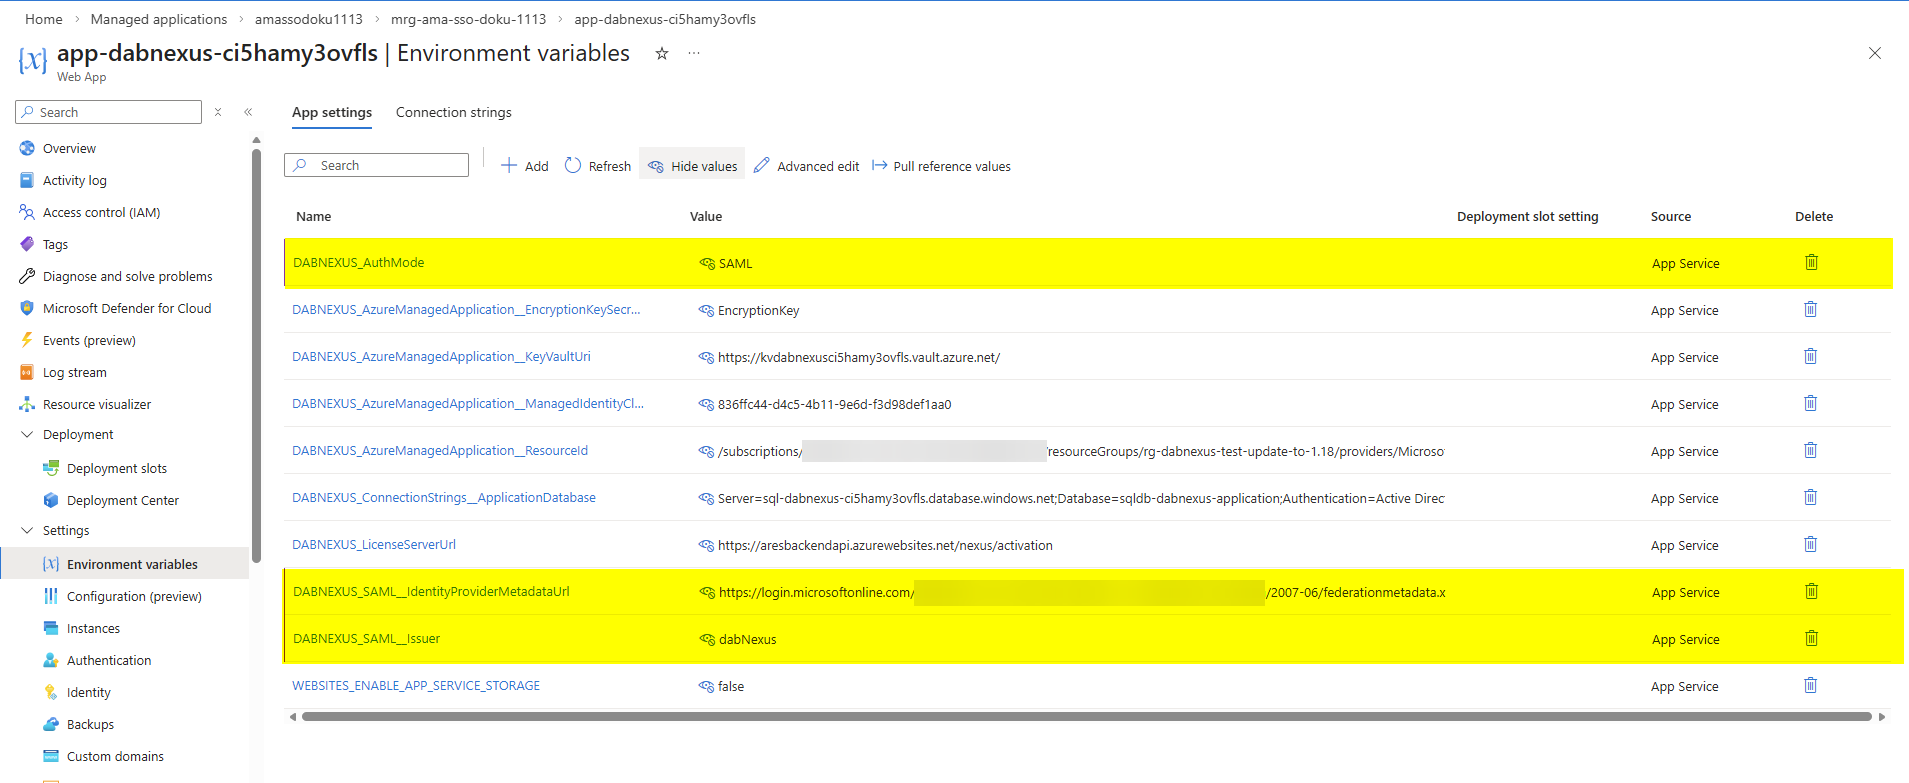 Save then environment variables. The App Service will then restart, and Single-Sign-On should be set up & working.