System Requirements for Fabric Connections
The Connections are an Extention for dab Nexus. It is necessary to license them separately.
If you obtain the Managed App via the Azure Marketplace, an App Service will be created automatically. All of the following points relating to the App Service will be relevant to you in this case!
1. Authentication Methods
The following resources are given as examples (you can rename these resources as you wish):
Resource Group: rg-azure-vm-nexus
User Assigned Managed Identity: mi-azure-vm-nexus
App Service: app-dabnexus-1234
Azure Virtual Machine: vm-dabnexus
App Registration: app-azure-vm-nexus
Application: dab-nexus
-
a. Service User
- MFA (Multi Factor Authentication): must be deactivated
- Authentication in dab Nexus: you must specify a username and password for the Fabric connection
-
b. Service Principal
- Find the Service Principal Key:
- Open the Azure Portal > App Registrations > open your Nexus App
- Manage > Certificates & secrets > Client secrets
- Value: this is the Service Principal Key
- Client ID: also necessary for the connection in dab Nexus
-
c. System-assigned managed identity (App Service OR Azure VM)
- App Service > find the System-assigned managed identity:
- Open Azure Portal > open your Resource Group > open App Service (e.g. app-dabnexus-1234)
- Settings > Identity: System assigned Status ON
- Azure VM > find the System-assigned managed identity:
- Open Azure Portal > open your Resource Group > open the Virtual Machine öffnen (e.g. vm-dabnexus)
- Security > Identity: System assigned Status ON
- App Service > find the System-assigned managed identity:
-
d. User-assigned managed identity (Managed App: UAMI will be created automatically)
- Find the User-assigned managed identity:
- Open Azure Portal > open your Resource Group > open App Service (e.g. app-dabnexus-1234)
- Value: name of the Managed Identity
- Find the User-assigned managed identity:
2. Requirements
- a. App Registration (only when using the Service User or Service Principal)
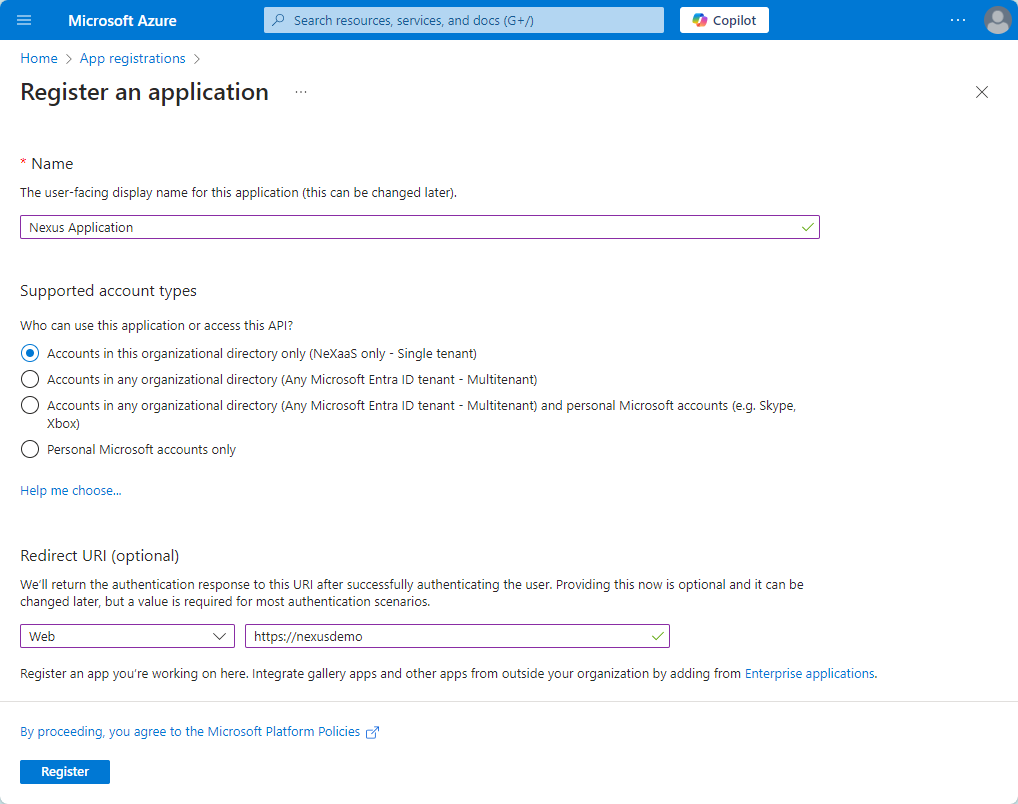
- Open the App Registrations in the Azure Portal and click + New Registration
- Name: enter the name of the registration (e.g. dab-nexus)
- Supported account types: choose the option Only accounts in this organisation directory (single client)
- Redirect-URI (only for Service User): choose Web in the dropdown list (Nexus is a web application) & enter the Application-URL of dab Nexus
- Application-URL (On-Premise): you can find it in the Configuration.json
- Application-URL (Managed App): open the Resource Group in the Azure Portal, open the Overview listing with the Type App Service and you will find the Default domain on the top right
Once you have entered all the information, you can click on Register at the bottom:
API permissions
Difference between Application Permissions and Delegated Permissions
Below, you will learn about the differences between Application Permissions and Delegated Permissions.
Delegated permissions are inherited. Inheritance occurs, for example, from the Subscription to the Resource Group or from the Resource Group to the individual Resources.
Application permissions are set directly in the application (e.g. dab-nexus) in the Azure Portal. You must enter several permissions.
To do this, click Add a permission and select Microsoft APIs. For more information, see this Microsoft documentation.
-
Delegated Permissions (Service User only)
- Power BI Service
- MirroredDatabase.ReadWrite.All
- Workspace.Read.All
- Lakehouse.ReadWrite.All
- SparkJobDefinition
- SparkJobDefinition.Execute.All
- SparkJobDefinition.ReadWrite.All
- Azure Storage
- user_impersonation
- Power BI Service
-
Application Permissions (Service Principal only)
- Power BI Service
- Tenant.Read.All
- Tenant.ReadWrite.All
- Power BI Service
Once you have entered all permissions, click Grant admin consent for Tenant name and confirm the message with Yes. For more information, see this section of the Microsoft documentation.
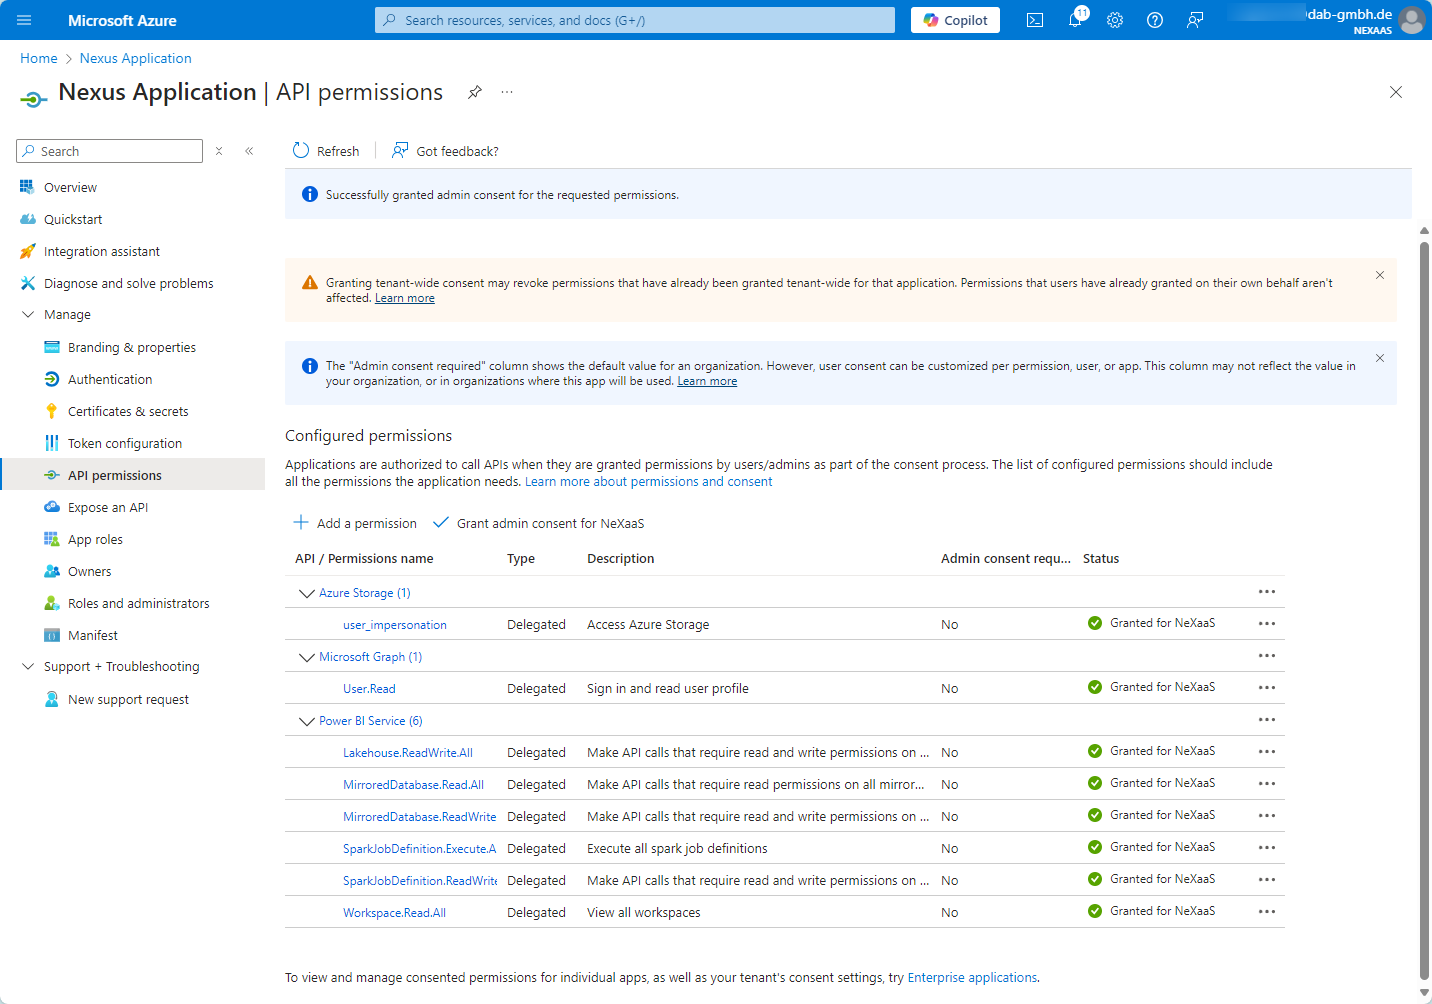
The API permissions listing for Delegated Permissions (Service Users) should look like this:
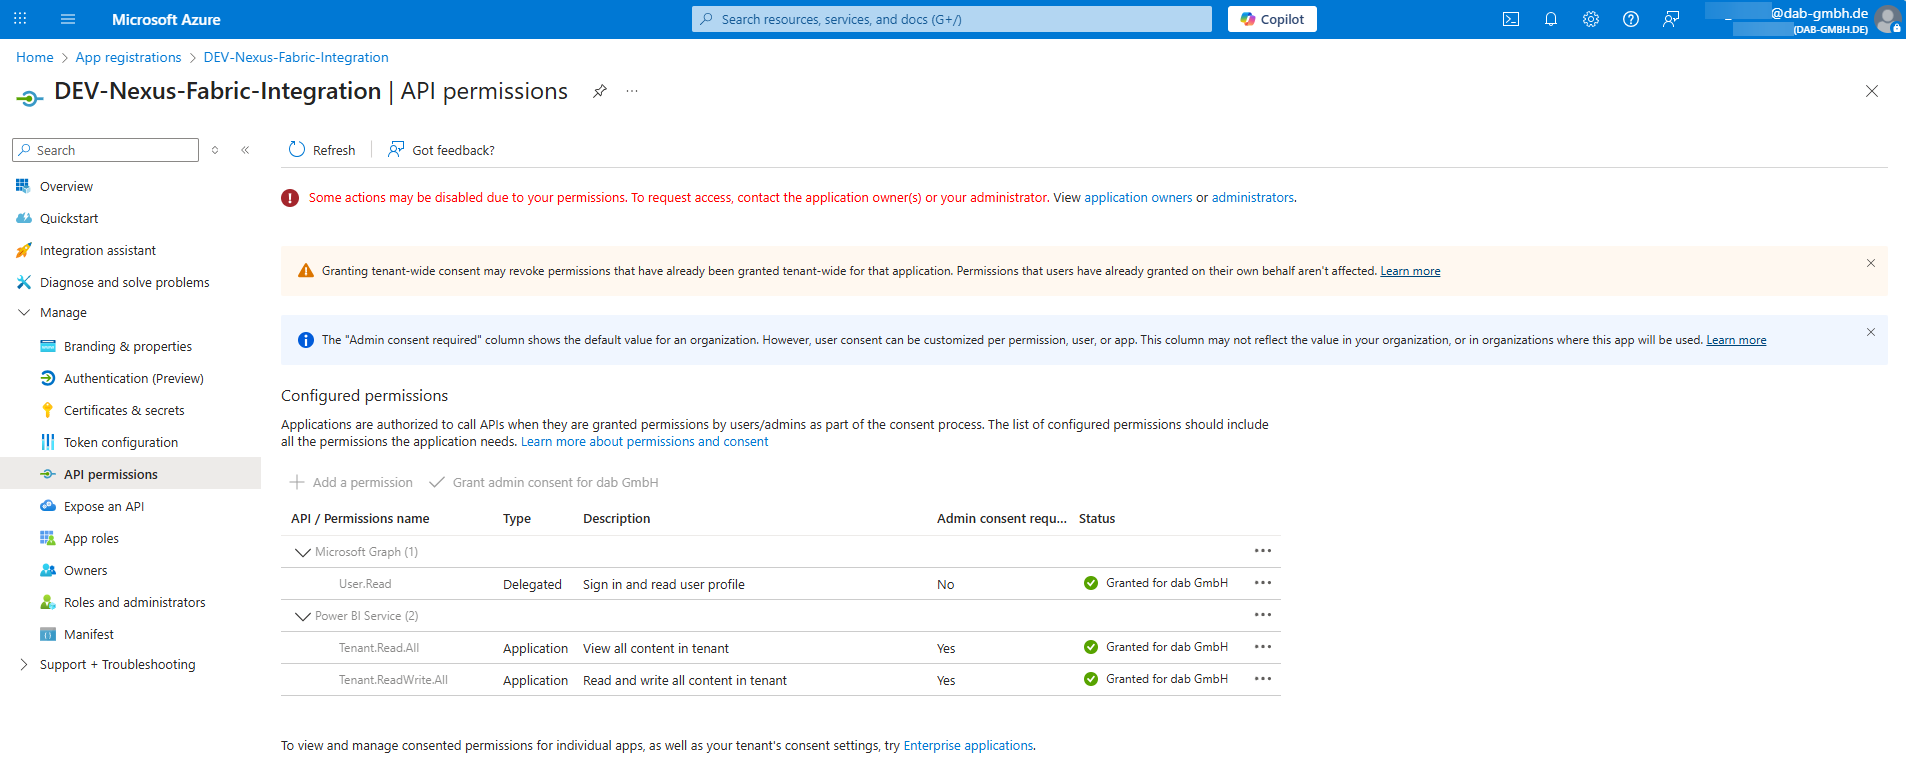
The API permissions listing for Application Permissions (Service Principal) should look like this:
After completing all the steps in the documentation, you will receive the Client ID required to connect to your dab Nexus application.
-
b. Chech the Tenant-Settings in the Fabric Admin Portal (Service Principal & both Managed Identities)
- open the Fabric Admin Portal and log in
- follow the steps in Service principals can call Fabric public APIs in the Microsoft documentation: these settings must be enabled for Service Principals and Managed Identities
-
c. Grant access in dab Nexus (Service user only)
- Basic Authentication
- Username & Password: enter username and password of the Fabric-Users
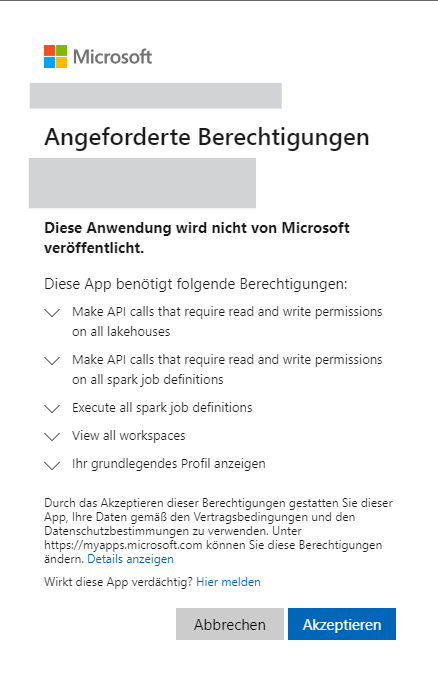
- Request API consent: here you must accept the required permissions once
- Basic Authentication
-
d. Set roles in Fabric Workspace
In Microsoft Fabric the user must have at least the role Contributor.
- Open Fabric: URL https://app.powerbi.com
- Log in: with your user
- Click on Workspaces
- Hover your mouse over the general workspace name and click on the three dots
- Click on Workspace Access
- Users and their roles: you can see them on the right-hand side
- Service User
- Enter the mail address of the Service User
- Service Principal
- Enter the name of the App Registration: e.g. app-azure-vm-nexus
- Grant access for the System-assigned managed identity:
- Enter the name of the Resource: name of the App Service or name of the Azure VM (e.g. app-dabnexus-1234 or e.g. azure-vm-nexus)
- Grant access for the User-assigned managed identity (Managed App: UAMI will be created automatically):
- Enter the name of the Managed Identity: e.g. mi-azure-vm-nexus