SAP-System
 Updated 4 months ago
by
Stephanie Krenz
Updated 4 months ago
by
Stephanie Krenz
To add a SAP system in dab Nexus click on Settings > SAP Systems and then on + SAP System.
You will then need to enter some settings:
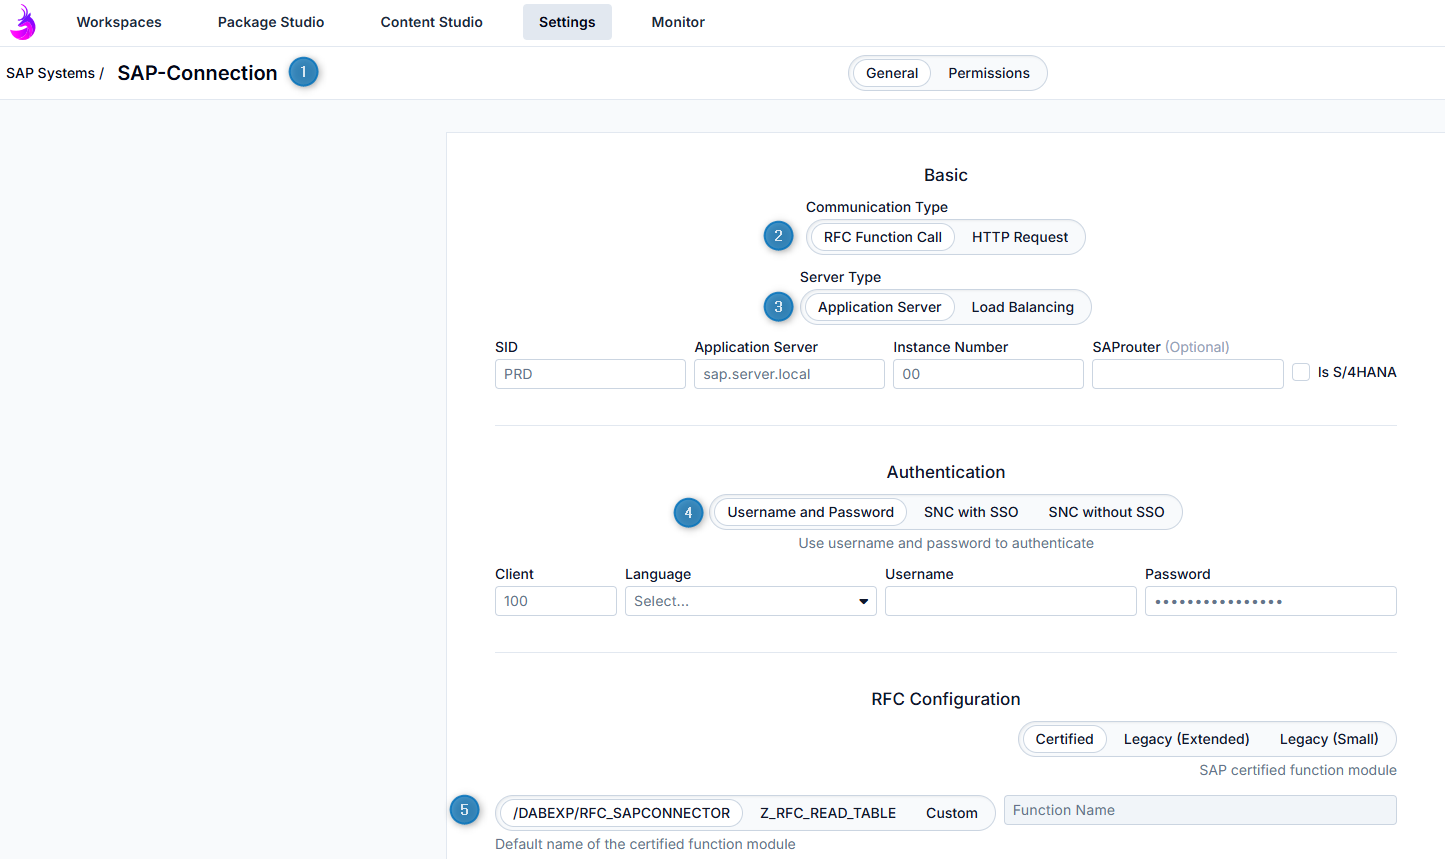
- Name for the SAP connection
- Communication Type
Here you have the option to set either an RFC function call or an HTTP request. Both options are explained in this article.
You have the following settings for HTTP Request:
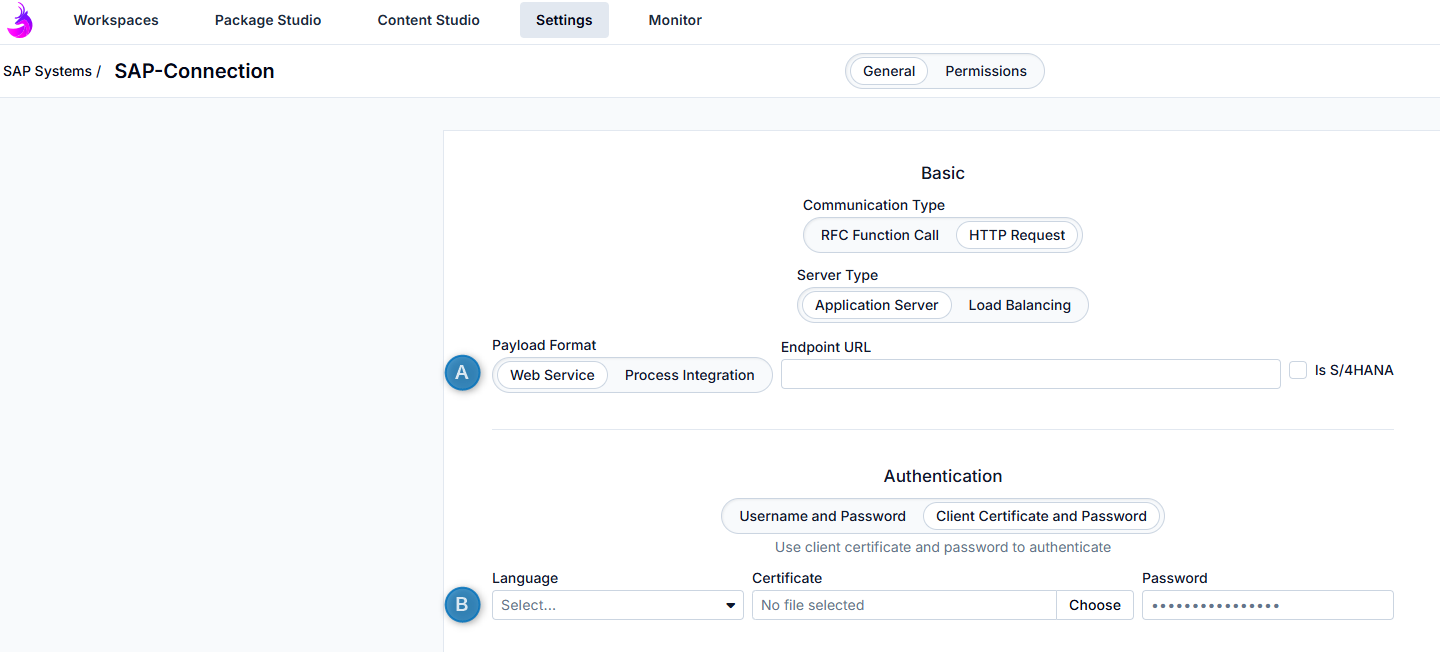
A Payload Format: Choose between Web Service and Process Integration, Endpoint URL, if needed tick the Checkbox Is S/4HANA if your SAP system is S/4HANA.
B Authentication: In addition to the already known Username and Password option, you have the Client Certificate and Password option.
- Client Certificate and Password (shown in the next screenshot)
- Client
- Language: System language when you log in in SAP
- Certificate: load certificate
- Password
- Server Type
- Application Server: System ID, Application Server, Instance Number, if needed SAProuter and activate the Checkbox Is S/4HANA (if your SAP system is S/4HANA)
- Load Balancing: System ID, Message Server, Group, if needed SAProuter and activate the Checkbox Is S/4HANA (if your SAP system is S/4HANA)
- Authentication: Login information to the system
- Username and Password
- Client
- Language: System language when you log in in SAP
- Username
- Password
- SNC with SSO
- Client
- Language: System language when you log in in SAP
- My Name (optional)
- Partner Name: you find the partner name in the transaction SU01 for the corresponding user - select the SNC tab and you find the value of the partner name in the field SNC name
- Quality of Protection: Choose between Authentication, Integrity, Privacy and Maximum Available
- Mechanism: you can find this information in the SAP Logon - right-click on the connection, select Properties and swith to the Network tab - here you find this information
- Kerberos und NTLM: if not available, select Individual (allows you to enter SNC Library Path and My Name)
- SNC without SSO
- Client
- Language: System language when you log in in SAP
- Username
- Password
- Partner Name: you find the partner name in the transaction SU01 for the corresponding user - select the SNC tab and you find the value of the partner name in the field SNC name
- My Name (optional)
- Quality of Protection: Wahl zwischen Authentication, Integrity, Privacy und Maximum Available
- Mechanism: you can find this information in the SAP Logon - right-click on the connection, select Properties and swith to the Network tab - here you find this information
- Kerberos und NTLM: if not available, select Individual (allows you to enter SNC Library Path and My Name)
- RFC Configuration
- Certified: SAP certified function module
- Legacy (Extended): Newer version of the function module based on Z_RFC_READ_TABLE with support for up to 8,000 characters per data record
- Legacy (Small): Smaller version of the legacy function module based on Z_RFC_READ_TABLE with a limit of 2000 characters per data record
- Function Module
- /DABEXP/RFC_SAPCONNECTOR: default, latest function module
- Z_RFC_READ_TABLE: old version of the function module
- Custom: name must be entered if the function module has been renamed
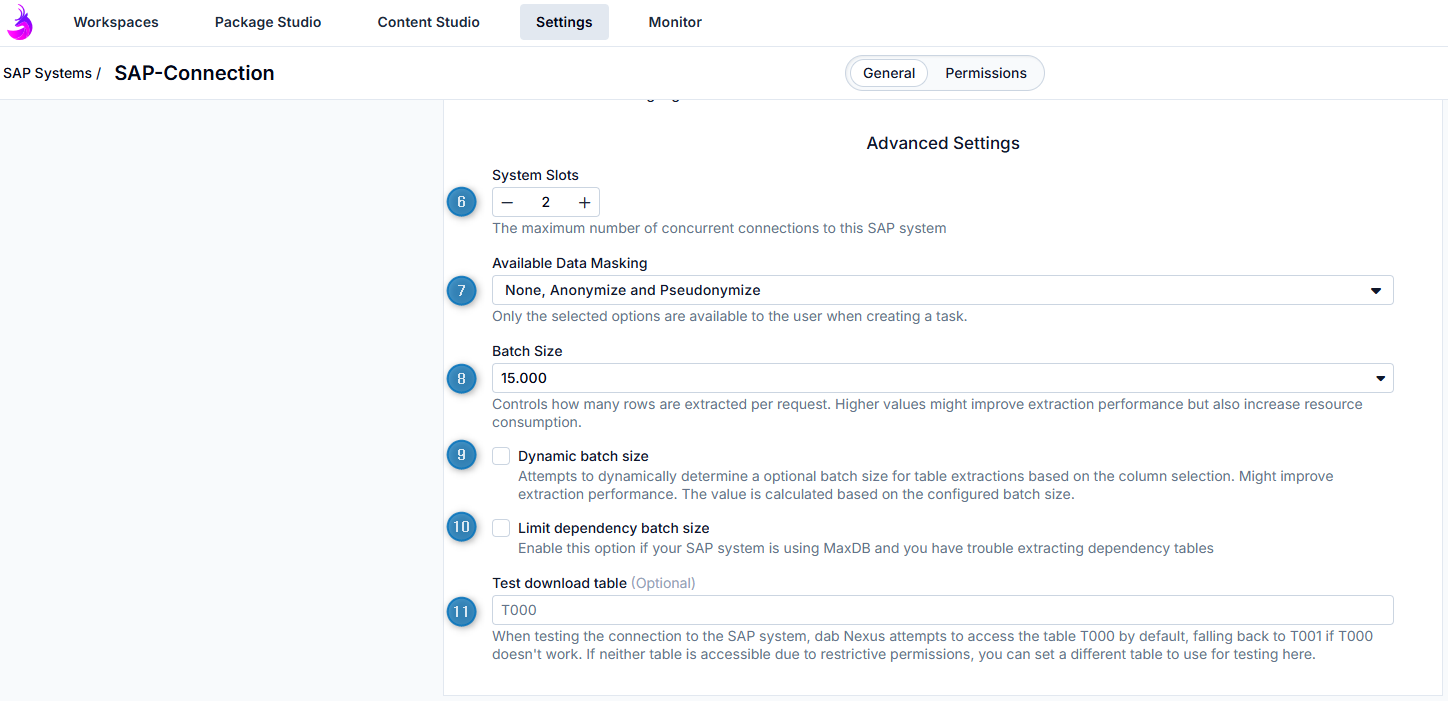
Limit dependency batch size and increasing the number of System Slots can lead to performance problems in your SAP system.
- System Slots: Maximum number of simultaneous connections to this SAP system (Standard: 2 Slots)
- Available Data Masking: Define which data masking options are available when creating tasks
- Batch Size: Specify the maximum number of lines to be extracted from the SAP system per request (Standard: 15.000)
- Dynamic batch size: attempts to optimise the row extraction based on the batch size and column selection of the table
- Limit dependency batch size: If your SAP system uses MaxDB and you are experiencing problems with data extraction, you can activate this option
- Test download table (optional): Here you can enter a table that will be used to perform the connection test (Standard: T000, Fallback: T001)
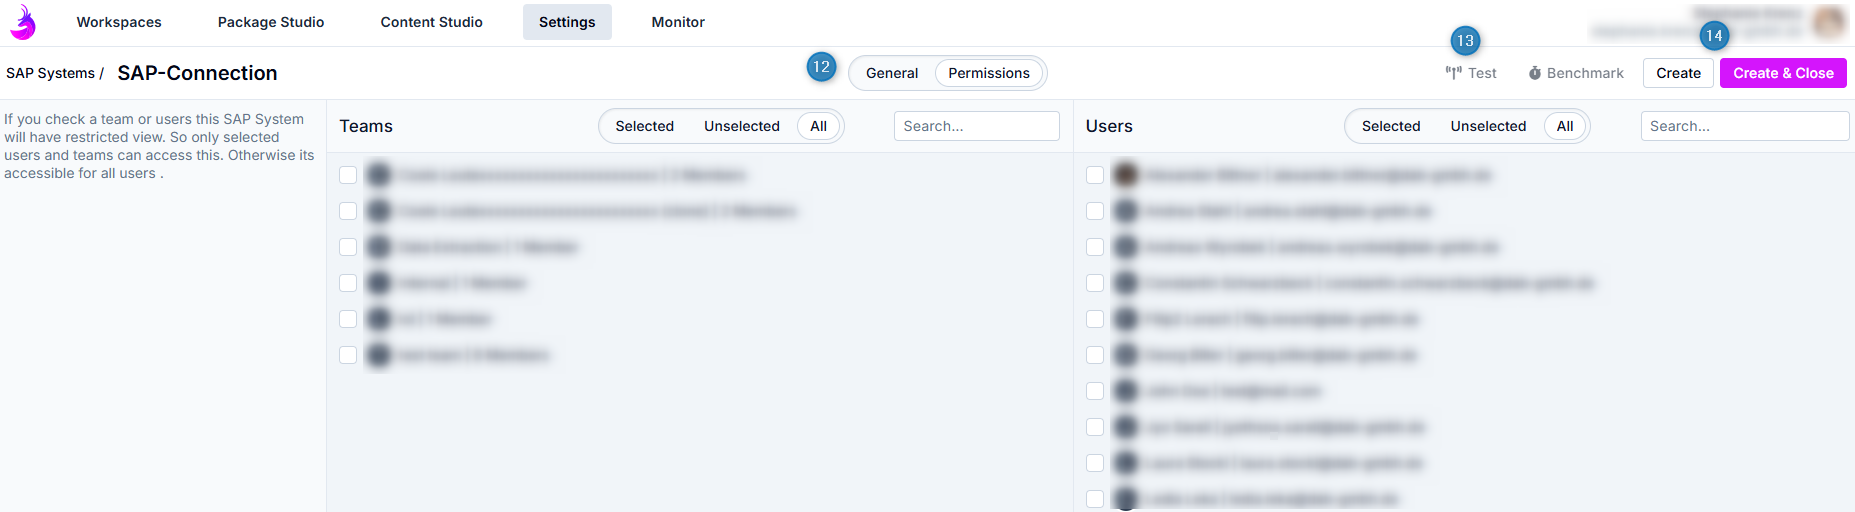
- General / Permissions: Switch between the tabs for the login details and the permissions for who can use this connection later
If you select teams or individual users in the Permissions area, only those teams or users will have access to this SAP connection later. If you do not select any teams or users here, everyone will have access to this connection.
- Test Connection (The connection to the SAP system can also be saved without a connection test)
- Test whether dab Nexus can access your SAP system with the stored settings
- A success message or error message will appear
- Create or Create & Close: Once all settings have been saved, the connection data for the SAP system can be saved. Click Create & Close to save the connection data, automatically exit the view and return to the list of saved SAP systems.
Once the SAP connection has been successfully created, you will receive a success message and the new connection will now be available in a table format together with all your other SAP connections. The following details are displayed:
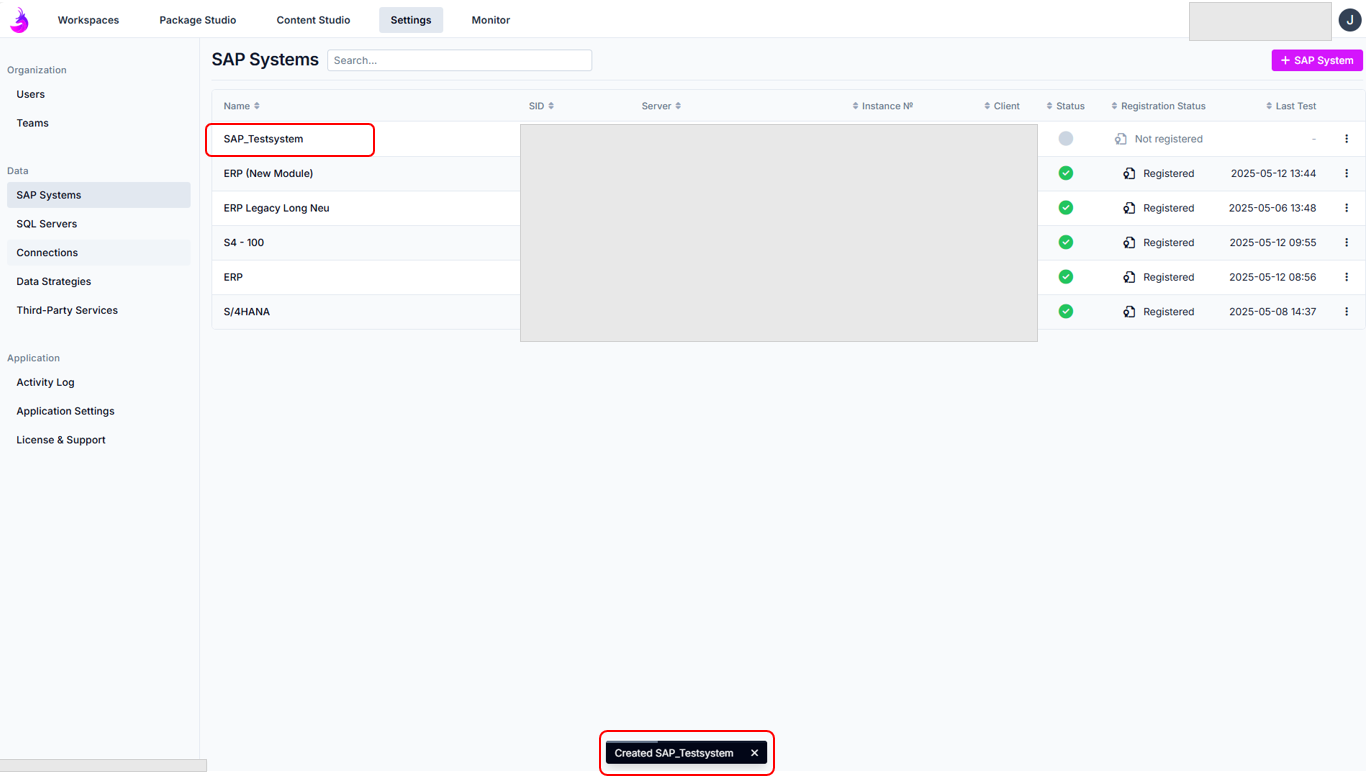
- Name of the connection to the SAP system, SID, Server, Instance number, Client, Status (Unknown, Connected, Failed), Registration Status and Last test.
Without a successful connection and registration, the SAP system stored here cannot be used.

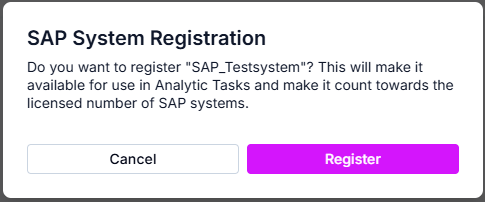
- Three dots next to the connection name: here you can test, register, change, copy, delete the connection and view a change history.
When an SAP system is registered in dab Nexus, it occupies one licence slot. The number of SAP systems that can be registered can be found in Settings > Licence & Support in the SAP Configuration section. This shows how many SAP systems are already registered and the maximum number that can be registered.

- Indicator, whether the SAP system is registered or not:
- Grey or Not registered: SAP system isn't registered
- Black or Registered: SAP system is registered (the option Register in the submenu is now grey)