Package Elements
 Updated 3 months ago
by
Stephanie Krenz
Updated 3 months ago
by
Stephanie Krenz
In this article, we will look at the elements located in the left-hand area of the package editor.
The following functions are available here:

Tables
Add an SAP table using the corresponding button above. You can give a table an alias, as shown for the BKPF table (you can find out how this works in the next article). All tables specified here are later stored as result tables.
Virtual Tables
Add a virtual table with the SAP table name using the corresponding button at the top. You can also assign an alias here. Virtual tables do not appear as result tables.
Filters
Use the corresponding button at the top to add a filter with which you can later restrict values. You can freely choose the name. Filters are applied to tables or virtual tables.
Repositories
Add a repository using the corresponding button at the top; the name can be freely selected. A repository is used to save intermediate results for further processing. You can see exactly what this means later in the examples.
Buttons on the right:
- Magnifier: search for elements
If you want to confirm the entry of a Table or Virtual Table during creation, enter a table name, press Enter (the Table is searched for in the selected SAP system) and then click on the desired Table name in the drop-down menu.
If you want to cancel the entry, simply click anywhere in the package editor in the empty area and the creation will be canceled.
As with the variants, you have the option of executing various functions with a right-click on the element. Jump to element (Jump to), copy (Duplicate) and delete (Delete).
Real-Time Objects
Add real time number range objects from SAP. A number range object is an object that is created in the SAP system and contains a defined set of unique character strings. They provide database records with unique numbers, to complete the keys of the data records.
Number Range Object is a list of Tcodes are populated in the dropdown.
Values - There are 2 options where you can either import the Number Ranges from SAP or enter your own values. The values range from 00 to 99
A simple number range object can be defined by just a few properties. In addition to the administrative details such as name, short and long text, and package, you simply have to define the following:
- The character range
- The percentage of numbers used at which the system should issue a warning
Number Length Domain
A number range object contains a set of unique, sequential characters. You define the set of available characters by selecting a suitable domain of the ABAP Dictionary. The data type on which the domain is based must be either NUMC or CHAR.
You should have authorizations to extract the SAP tables NRIV, NRIVSHADOW, TNRO & TNROT
Reports
To be able to use this function, adjustments need to be made. You can find all the information about this in this article.
The name of the report must be valid.
In order to be processed in dab Nexus, the following characters are not permitted in the report name:
` $ % & ( ) + - : [ ] { } < >
You can use the corresponding button to insert an existing report from your selected SAP system. If the report name is marked in red in the list and has an indicator at the beginning of the line (triangle with exclamation mark), the report could not be found in the SAP system you selected. In this case, make sure that the name corresponds.
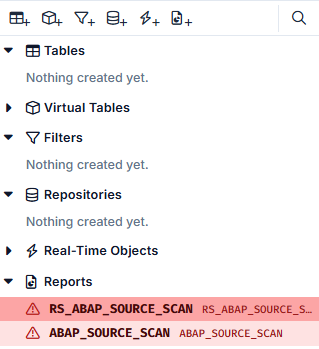
Here you can clearly see that the report ABAP_SOURCE_SCAN does not exist in the SAP system in this case. The report RS_ABAP_SOURCE_SCAN is not marked, therefore it could be found.
SAP-Transaction is not the Reportname
If you enter an SAP transaction as a report, the report linked to it is not recognized by dab Nexus and entered automatically. You must therefore enter the name of the report directly.
With the following steps you can find out how to find the report name using the transaction (here using the example of transaction FBL1N):
- Open your choosen SAP-system
- Enter the transaction on the top left and press ENTER
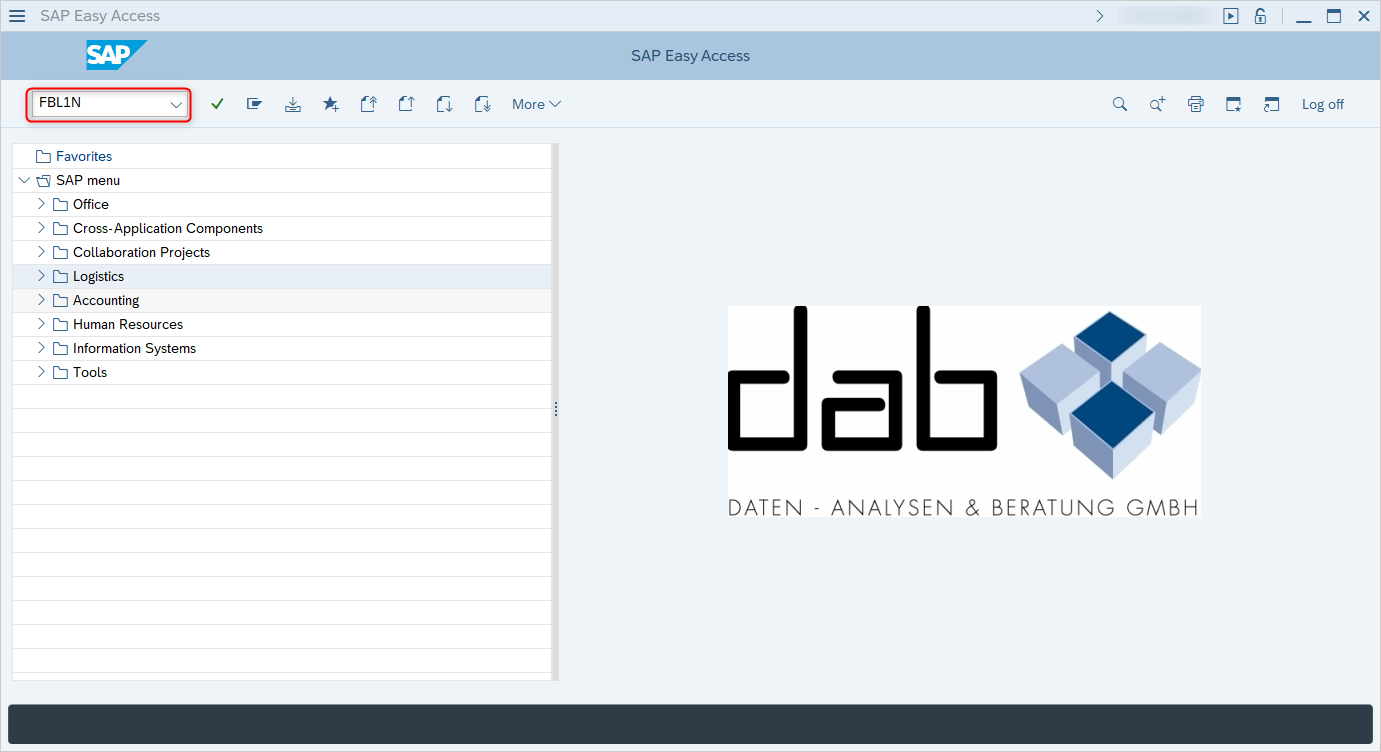
- In the window that opens, click on the system name either at the top right or bottom right (depending on the layout)
- A submenu opens and under Program you will find the report associated with the transaction, which you can then use in dab Nexus
