Azure Data Lake Storage

Important:
1. ADLS Connection operates under the Fabric replication in the License.
2. All requirements must be met – the information you need can be found here
1. ADLS Connection operates under the Fabric replication in the License.
2. All requirements must be met – the information you need can be found here
Prerequisites
Configure your storage account to connect to dab Nexus:
- Login to Azure Portal and navigate to your Azure Storage account. In the left pane, navigate to Data management -> Data protection. Deactivate Enable soft delete for blobs, Enable soft delete for containers, Enable version-level-immutability support. Save the changes.
- Data Lake Gen2 upgrade - In the storage account in the left pane, navigate to Settings -> Data Lake Gen2 upgrade. There are 3 steps. Complete all to upgrade.
ADLS
- Click Settings > Connections, then click + Connection: select Azure Data Lake Storage.
- Name: Give the new connection a name.
General
- ADLS Endpoint URL - In Azure Portal under your Data Lake Storage Gen2 account, navigate to Data storage -> Containers. Select the container you have created. In the left pane, select Properties. Copy the URL. The general format is https://<adlsstroageaccount>.blob.core.windows.net/<container>
- Directory Structure
Choose how your data is organized within the Azure Data Lake Storage container.- Flat - Files are stored in a flat hierarchy, typically in a single folder or in a few folders without a deep structure. There are no subdirectories that represent a temporal or incremental separation.
- Incremental - ADLS Gen2 directory structure for incremental updates typically involves organizing folders by date or time, such as
YYYY/MM/DD/HH/orYYYYMMDD, so that only new files within a specified time range are processed by data pipelines.
- File Format
- CSV
- Parquet
Authentication
Authentication Type
- Service Principal - Refer to the article for the Service Principal sections to add the corresponding API scopes and the roles required to be assigned. This step has to be completed to configure Service Principal.
Configure the Access control (IAM): At the container and storage account level (in the Azure ADLS account), navigate to Access control (IAM) add Storage Account Contributor and Storage Blob Data Contributor roles for service principal.- Tenant ID - In the Azure Portal, under Microsoft Entra Id -> Overview.
- Client ID - In Azure Portal, under Microsoft Entra Id -> Manage -> App registrations -> <Your App>. Navigate to your app and copy the Application (client) ID.
- Client Secret - In Azure Active Directory -> App registrations -> Your App. Navigate to your app. Go to Manage -> Certificates & secrets. Under Client secrets, Value contains the Client Secret.
- Shared Access Signature
- SAS Token - To use Shared Access Signature Authentication, in your ADLS Storage account navigate to Security + networking -> Shared access signature. When generating a shared access signature, service, container, and object must also be checked under “Allowed resource types.”
Click Generate SAS and connection string to create the SAS token. Copy the string.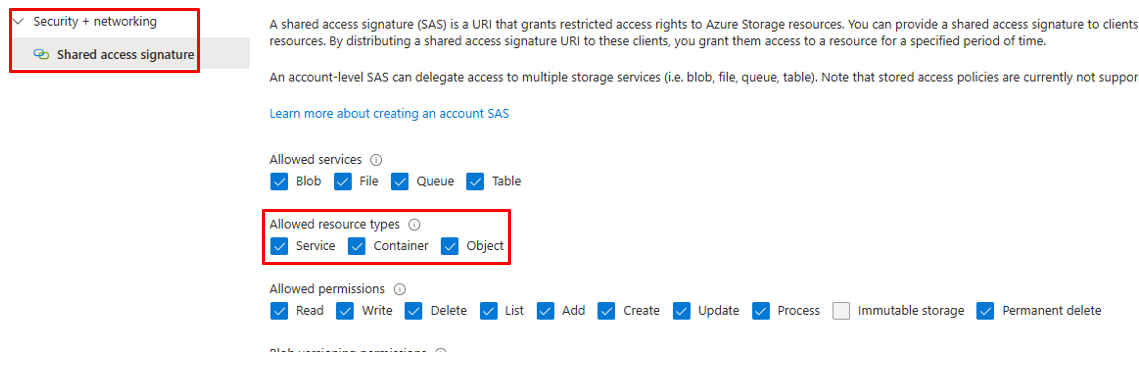
- SAS Token - To use Shared Access Signature Authentication, in your ADLS Storage account navigate to Security + networking -> Shared access signature. When generating a shared access signature, service, container, and object must also be checked under “Allowed resource types.”
- Access Key
- Access Key - Obtain the access key from the ADLS Storage. In the left pane, navigate to Security + networking -> Access keys. Copy the value of Key.