Users
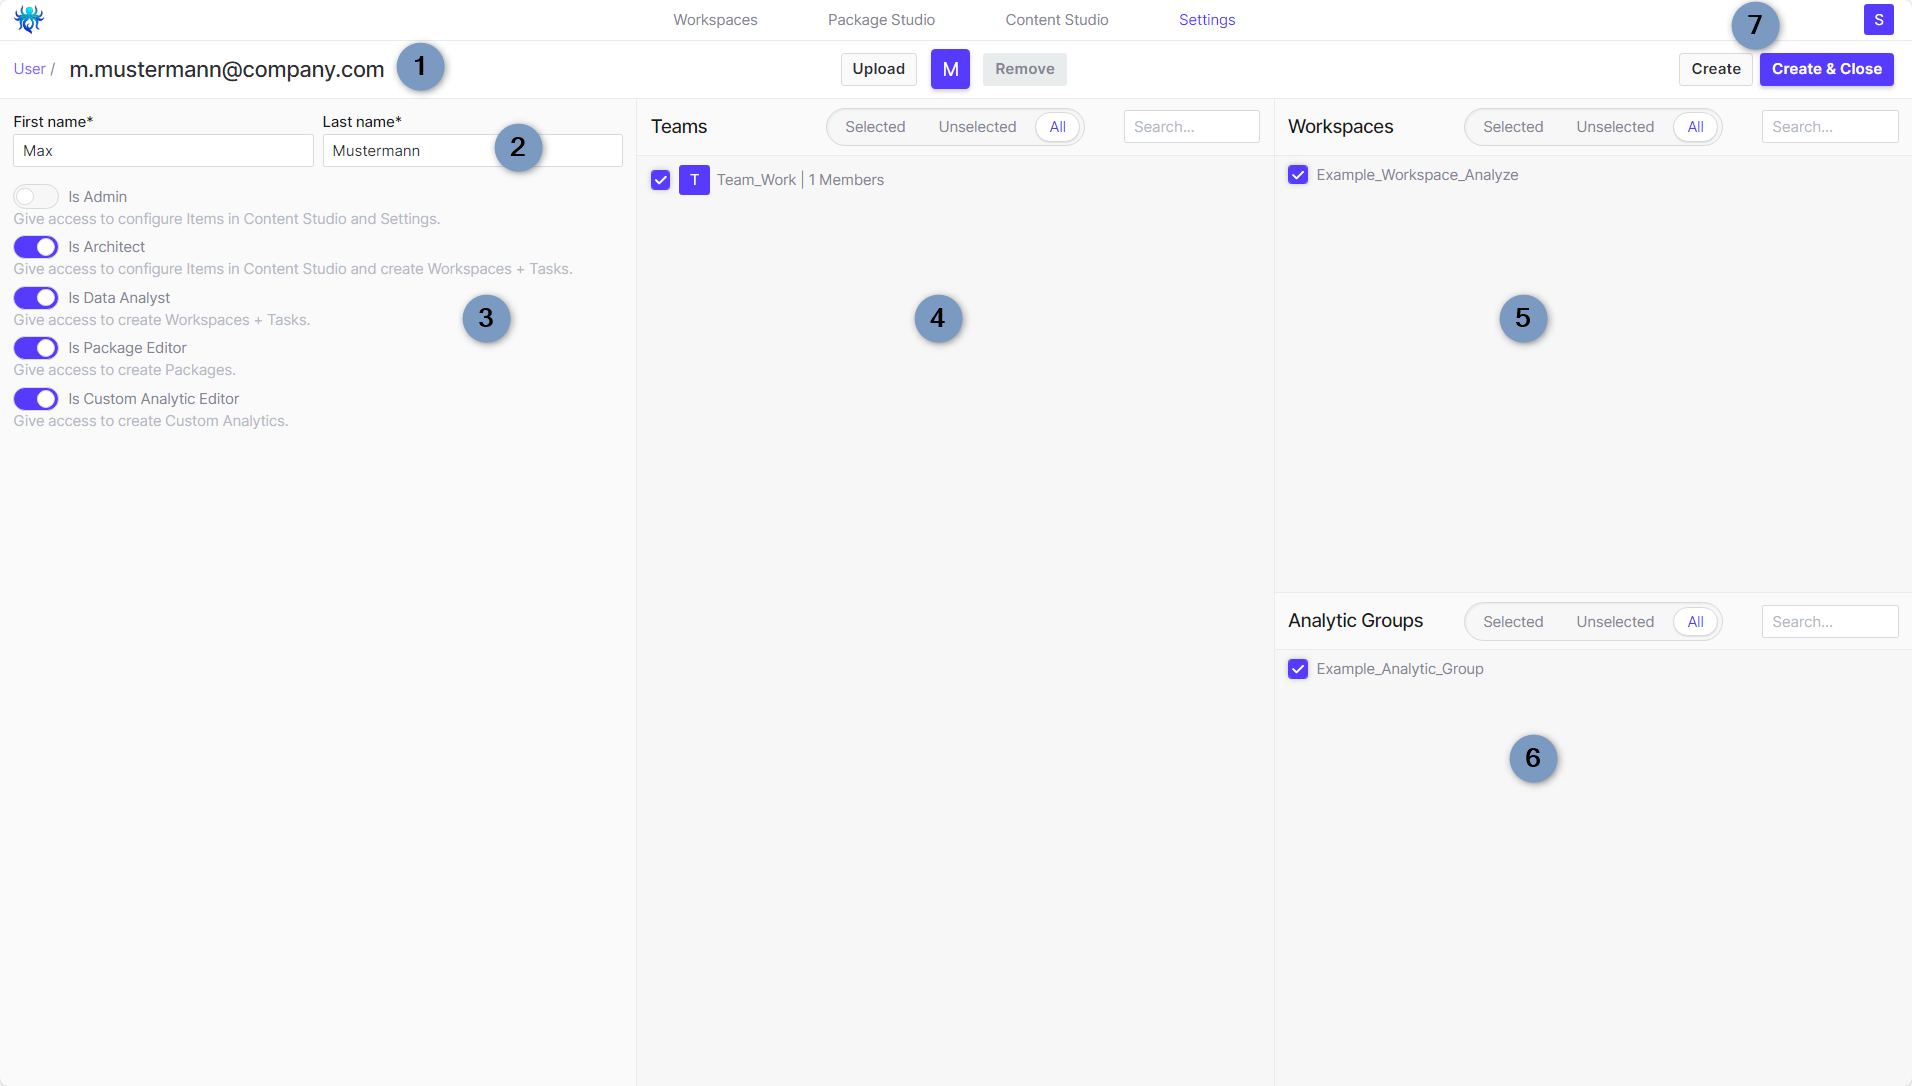
You can create or change a user in dab Nexus with the following steps:

- Click on Settings at the top and select Users on the left-hand side
- Click on + User on the top right
You can or must enter the following information:

- Mail-Address
- First name and Surname
- Role Assignment: at least one role must be assigned
- Admin: Change Settings, Access for Content Customization in the Content Studio
- Architect: Access for Content Customization in the Content Studio, Creation of Workspaces and Tasks
- Data-Analyst: Creation of Workspaces and Tasks
- Package Editor: Creation of Packages via the Package Studio
- Custom Analytic Editor: Creation of Custom Analytics via the Content Studio
The following settings are Optional:
- Teams: Assign Users to existing Teams
- Workspaces: Assign Users to existing Workspaces
- Analytic Groups: Assign Users to existing Analytic Groups
- Create or Create & Close: As soon as all Settings are stored, the user can be saved. The user is created with Create & Close and the view is automatically exited and returned to the user list

The new user is now available in the list. The following details can be seen:
- Mail-Address
- Full Name
- Number of Teams to which the user is assigned
- Number of Workspaces to which the user is assigned
- Number of Analytic Groups to which the user is assigned
- Marking for the Roles for which the user has been authorized: here all Roles
- Three dots at the end: The user can be changed (Edit), copied (Clone) or deleted (Delete) here with one click
An existing User can only be deleted by an Admin.
An Admin cannot delete their own User, this must be done by another Admin.

