Allow & Deny Lists
 Updated 4 months ago
by
Stephanie Krenz
Updated 4 months ago
by
Stephanie Krenz
You can use Allow & Deny lists to manage data records. This allows you to define allowed and disallowed values in an analytic group. They adjust the analyses and ensure that only authorized data is used. The Allow & Deny lists are part of the security system and help you to protect data and ensure compliance with regulations in your company.
Creation
You can create an Allow & Deny list by clicking on Content Studio at the top, then Allow & Deny Lists on the left and finally + Allow & Deny List at the top right:

Contents
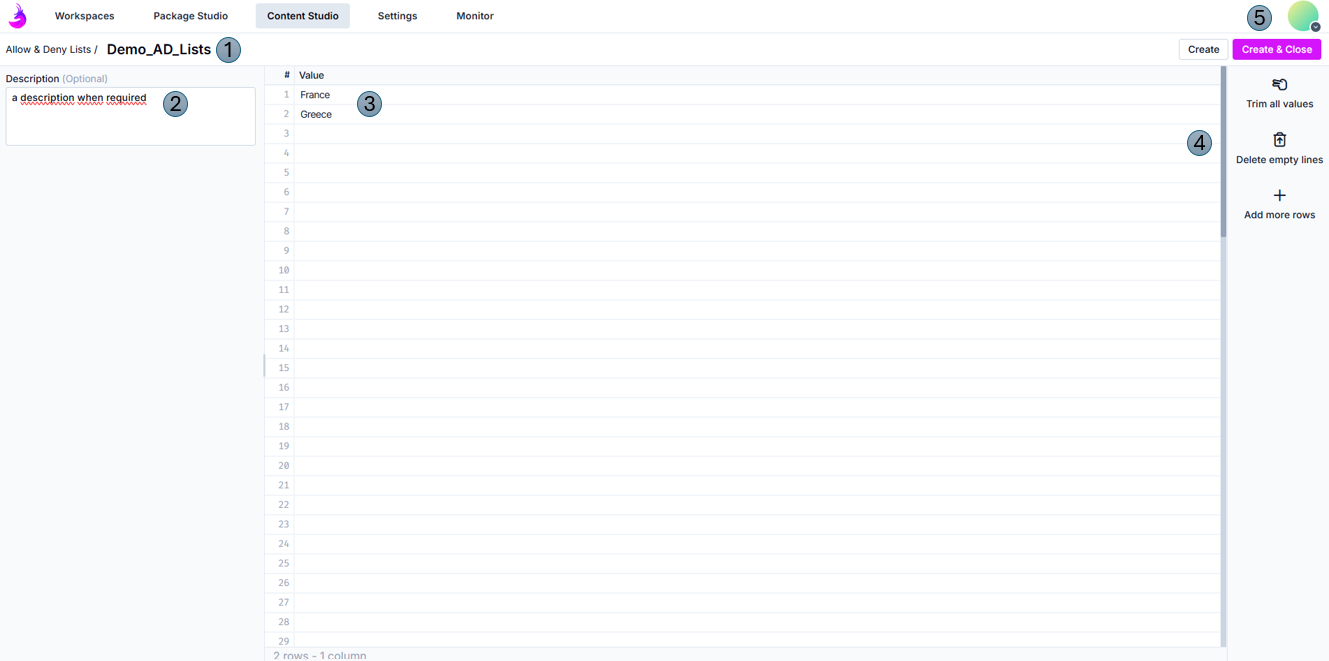
- Name: enter a Name for the list
- (Optional) Description: enter a description
- Values: enter values in your list (in the example above a list of countries)
- Functions: on the right-hand side next to the table you will find three functions:
- Trim all values: deletes spaces that are attached to the values in the line entries
- Delete empty lines: deletes empty rows in the table (down to 100 rows = standard table size)
- Add more rows: adds 100 new rows to the table
- Create or Create & Close: as soon as all settings are stored, the list can be saved. Create & Close creates it, this view is automatically exited and you return to the overview of existing Allow & Deny Lists. A message for the successful creation of the list appears here.
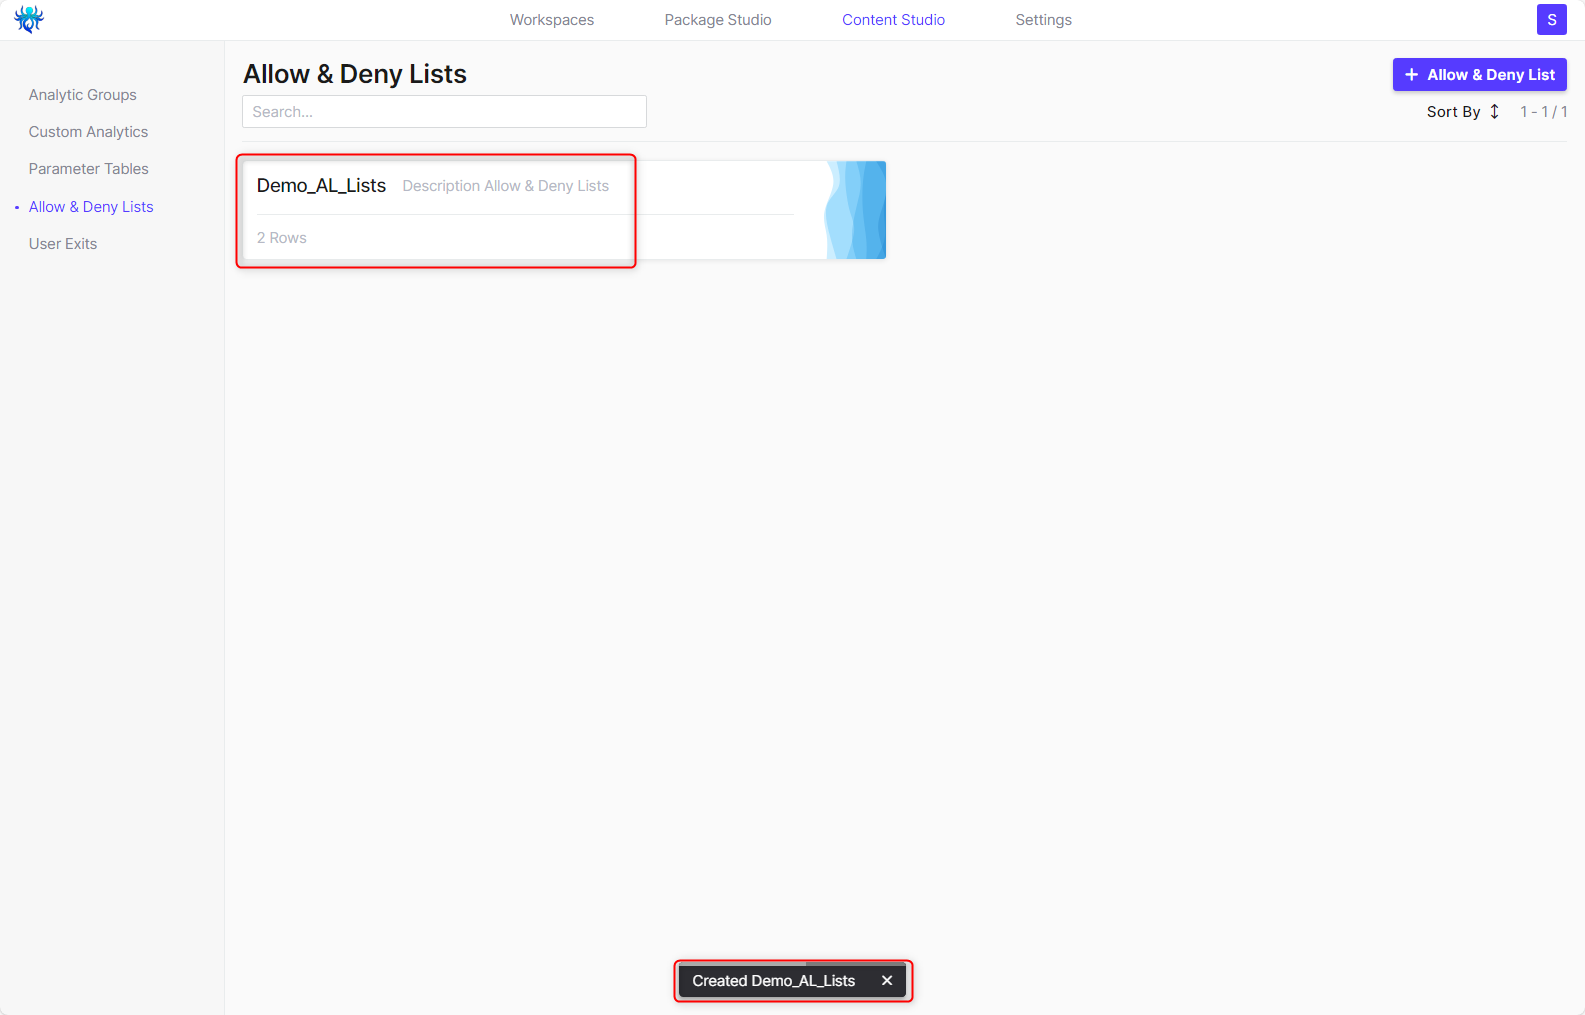
In this overview you will see the name of the list as well as the description (if available). Below this, you can see how many entries the list has.
With the three dots to the right of the name you can change (Edit), copy (Clone) or delete (Delete) the Allow & Deny List.