Installer Execution

Installation
- Start the dabNexus_Installer_[Version].exe with Run as administrator by right-clicking on the setup file
- The dab Nexus Setup opens and checks the necessary system requirements. As soon as the checks are complete, you can continue by clicking on Next

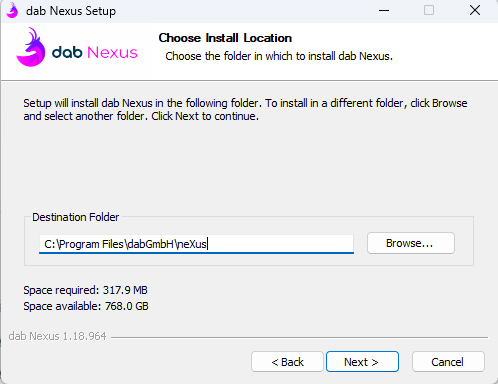
- In the following window, you can enter the Destination Folder. The path shown in the next screenshot is the default path. Click on Browse to change the directory in which dab Nexus is to be installed. After the directory has been changed, if desired, click on Next
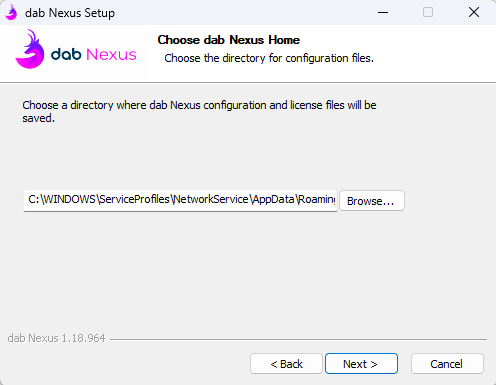
- Next, you can select the directory in which your Configuration and License Files should be saved, or you can have the files saved in the default location
- Configure the Database Connection for dab Nexus (following screenshot)
- Server: define the Database Server
- Database: enter the name of the Database you want to use for dab Nexus
- Encrypt Connection: SQL-Server can use Transport Layer Security (TLS) to encrypt data transmitted over a network between an instance of SQL-Server and a client application. TLS encryption is performed within the protocol layer and is available for all supported SQL-Servers
- Windows Authentication: activate this checkbox if you want to use Windows Authentication for log on to your SQL Server
- Username and Password: define the username and password if you want to use SQL Authentication
If you enter this data, the Connection String is automatically defined for the parameters you have entered.
You can also continue with the installation without entering the configuration parameters in this installation step. Instead, you can manually change the parameters in the Configuration.json File in the DAB_NEXUS_HOME, where the configuration file should be located. The steps for customizing the configuration file can be found in this article.

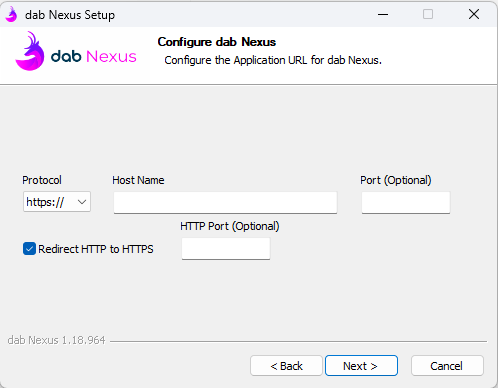
- Next, define the Application URL for calling dab Nexus. The default value is https://localhost:8080
- Host Name: enter the host name (application URL
- Port: optional
If you use HTTPS in the Protocol field, you need an SSL certificate. Without this certificate, the Windows Service of dab Nexus cannot be started later. If you are not using an SSL certificate, select HTTP in the Protocol field.
- Here, the encryption key is generated. You will need this if, for example, you want to migrate the dab Nexus installation to another server at a later date. As soon as you click on the button Generate Key, an encryption key will be saved in two different locations. Continue with a click on Install

- Once you have created the encryption key, a popup window appears in which the storage location of the key is specified. The encryption key is copied to two different storage locations, which are specified in the popup.
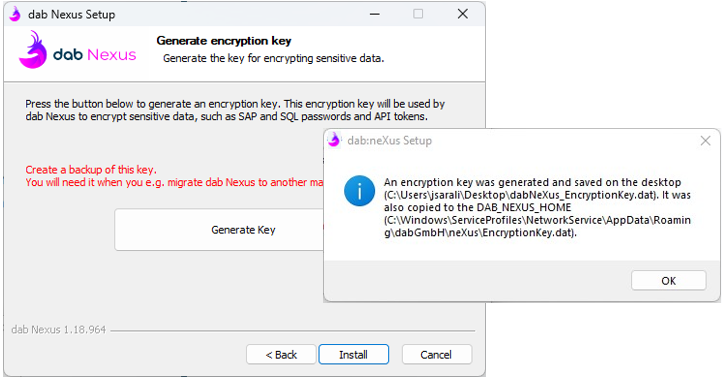
If the encryption key is lost, it cannot be restored
- If required, click OK to confirm and continue installing.
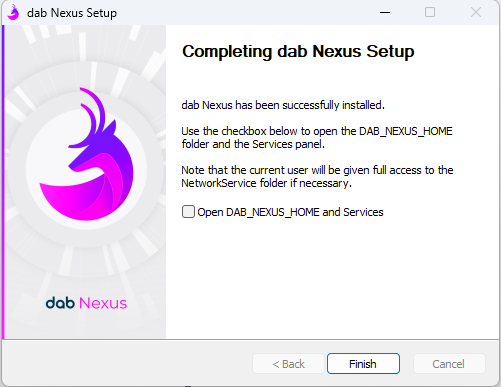
As soon as the installation has been completed, the services and the file storage location of DAB_NEXUS_HOME can be opened in the last window. To do this, activate the checkbox Open DAB_NEXUS_HOME and Services. Click on Finish to complete the installation
Start Windows Service
- Open the Services via the Windows symbol or via the statement services.msc

- Search for the dab Nexus service and mark it with a click, then you can start the service via Start on the left side

- Call up the dab Nexus application in a web browser via the application URL that you have defined in the Configuration.json in the DAB_NEXUS_HOME directory (e.g. http://myserver.mycompany.com)