Enable Transport Security
Enable Transport Security
To enable transport security (SSL) in the dab:Exporter server you need to have a PKCS#12 (PFX) file. This file must be imported in the certificate store on the server where the dab:Exporter server is installed and the user running the dab:Exporter Windows service has to have access to this certificate. Moreover you have edit the dab:Exporter server configuration file. Furthermore all clients have to trust this or a superior certificate in order for the clients to connect to the dab:Exporter server using transport security.
Reuse Analytic Exchange by Galvanize certificate
If there is an Analytic Exchange by Galvanize installation on the same computer on which the dab:Exporter is installed you can reuse the certificate of Analytic Exchange by Galvanize. In order to reuse the certificate you have to convert it into the PKCS#12 format.
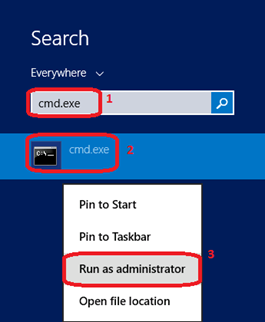
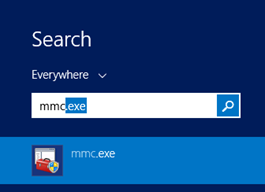
Open a Command Prompt as administrator by searching for cmd.exe
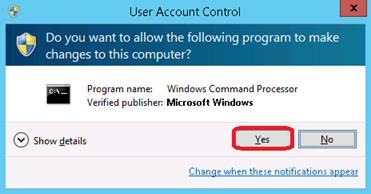
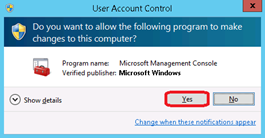
Click on Yes
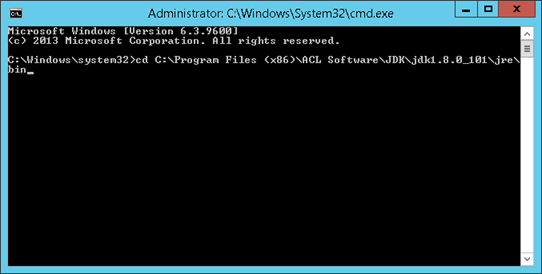
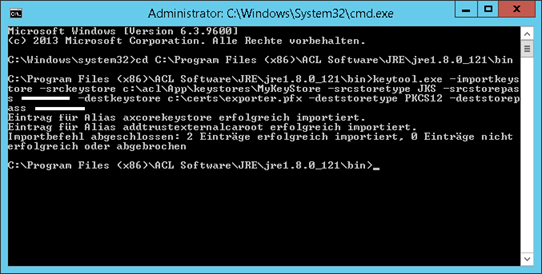
Change to the bin directory of a Java installation (JRE or JDK). Typical locations for Java installations with Analytic Exchange by Galvanize are (please note that the version numbers might differ)
- C:\Program Files (x86)\ACL Software\JDK\jdk1.8.0_101\jre\bin
- C:\Program Files (x86)\ACL Software\JRE\jre1.8.0_121\bin
Enter following command
keytool.exe -importkeystore -srckeystore KEYSTORE_FILE_LOCATION -srcstoretype JKS -srcstorepass PASSWORD -destkeystore PKCS_12_FILE.pfx -deststoretype PKCS12 -deststorepass PASSWORD
KEYSTORE_FILE_LOCATION: default c:\acl\app\keystores\mykeystore
PASSWORD: can be obtained from the server.xml (default: c:\ACL\App\Tomcat\conf)
PKCS_12_FILE: In this manual c:\certs\exporter is used
Import certificates
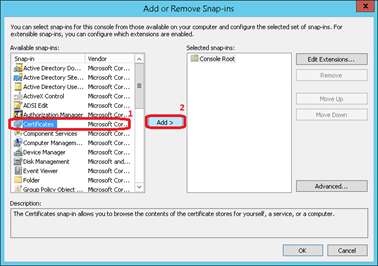
Open the Microsoft Management Console by searching for mmc.exe
Click in the User Account Control dialogue Yes
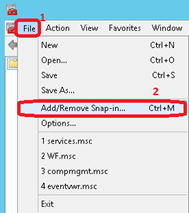
Click on File and then Add/Remove Snap-in…
Scroll to Certificates and klick on Add >
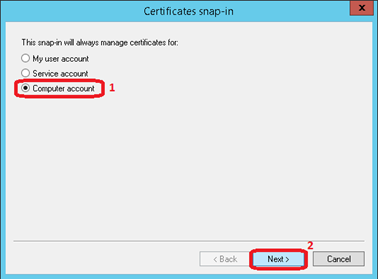
Select Computer account and klick on Next >
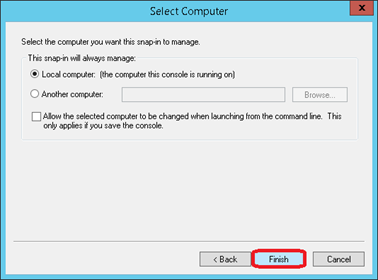
Click on Finish
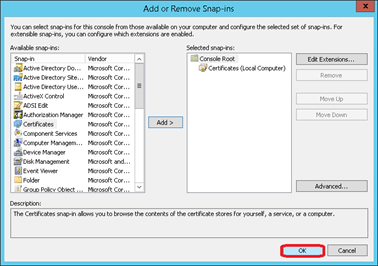
Click on OK
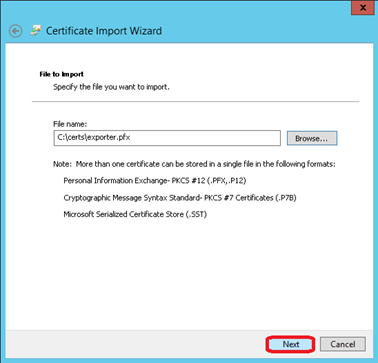
Server (PFX) certificate
Open the Certificates node and right click on Personal. There you have to select All Tasks and then Import…
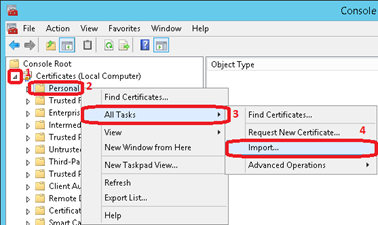
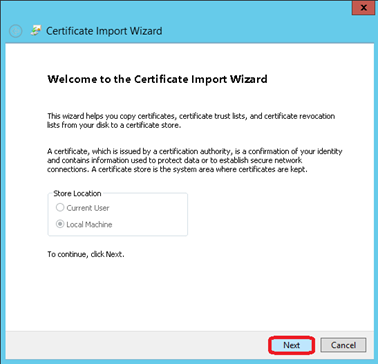
Click on Next

Click on Browse…
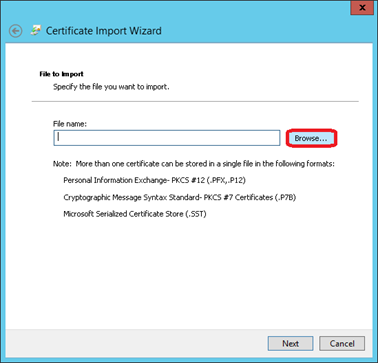
Navigate to the location where the certificate is stored. Then change the file filter to Personal Information Exchange (*.pfx; *.p12)
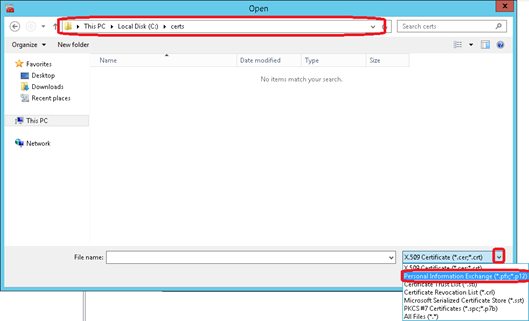
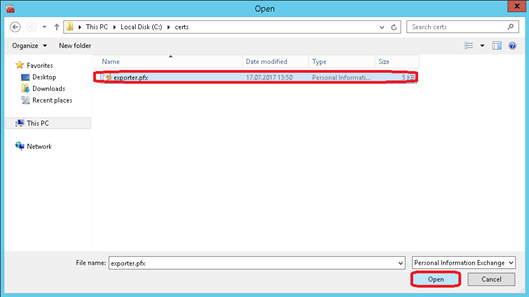
Select the certificate and click on Open
Click on Next
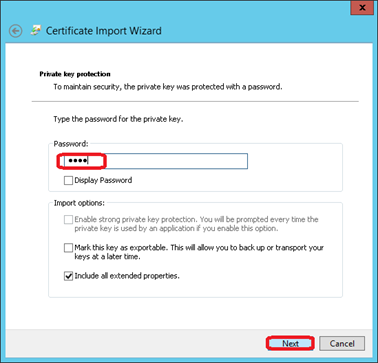
Enter the password for the private key and click on Next
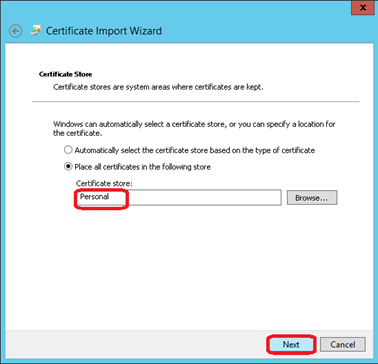
Ensure that the certificate store is set to Personal and click on Next
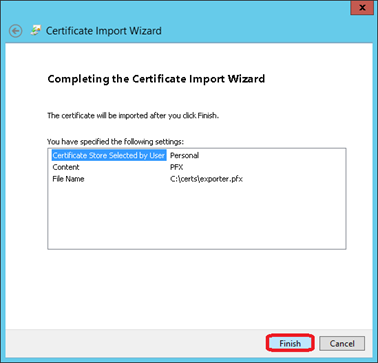
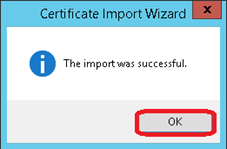
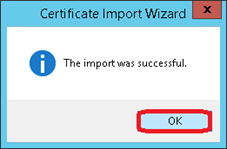
Click on Finish
Accept the dialogue with OK
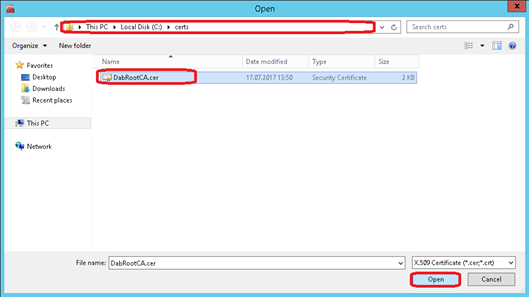
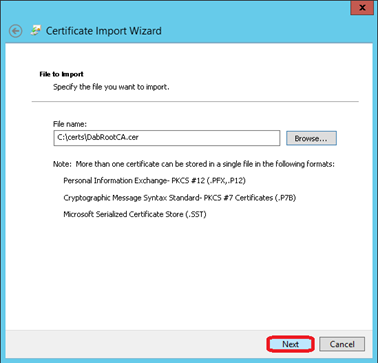
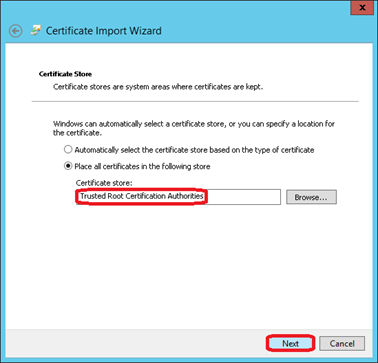
Server certificate (CER) self-signed or custom CA
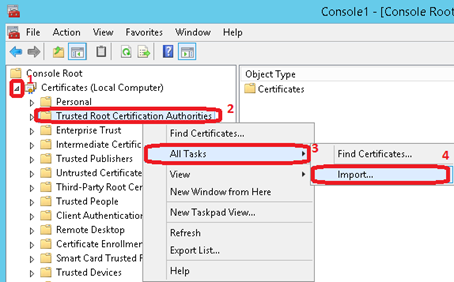
Open the Certificates node and right click on Trusted Root Certification Authorities. Then select All Tasks and click on Import…
Click on Next
Click on Browse…
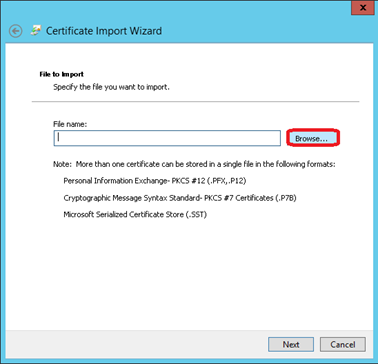
Select the folder in which the certificate is located, select the certificate and click on Open
Click on Next
Ensure that Trusted Root Certification Authorities is selected and click on Next
Then click on Finish
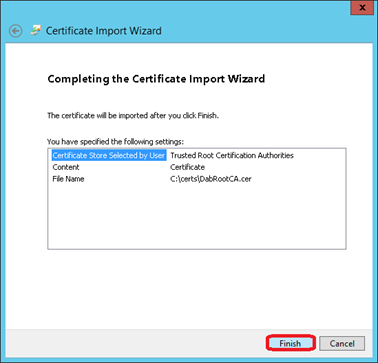
Click on OK
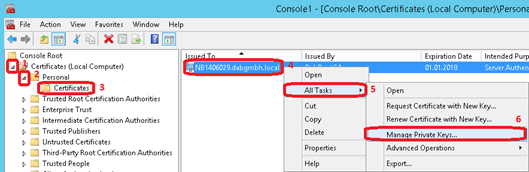
Set certificate access for dab:Exporter Server
In the Microsoft Management Console add the certificate snap-in for the Local Computer. Then open the Certificates and Personal node and select Certificates. On the middle screen right click on the server certificate and select All Tasks and then click on Manage Private Keys…
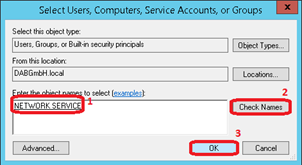
Click on Add…

Enter the name of the user of the dab:Exporter Windows Service (default NETWORK SERVICE). Click on Check Names and then on OK
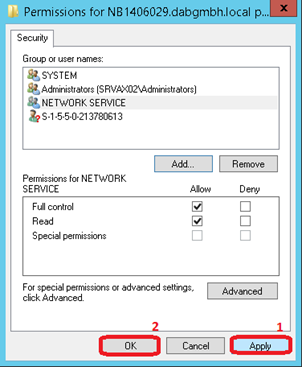
Click on Apply and then on OK
Configure dab:Exporter Server for Transport Security
To enable transport security you need to change entries in the file dabExporter.Core.dll.config which is located in the installation directory of the dab:Exporter server (default C:\Program Files (x86)\dabGmbH\dabExporter 3.2\Server).
You need to change the value of UseTransportSecurity to true and enter the thumbprint of the certificate in CertificateThumbprint.
<?xml version="1.0" encoding="utf-8" ?>
<configuration>
  <appSettings>
    <add key="ConfigFolder" value="%public%/dabgmbh/dabexporter 3.2/data"/>
    <add key="LogFolder" value="%public%/dabgmbh/dabexporter 3.2/log"/>
    <add key="WorkingFolder" value="%public%/dabgmbh/dabexporter 3.2/work"/>
    <add key="BindTo" value="0.0.0.0"/>
    <add key="ApiPort" value="1588"/>
    <add key="MessagingPort" value="1589"/>
    <add key="UseTransportSecurity" value="true"/>
    <add key="CertificateThumbprint" value="77299757ffa2aeaeea7523d5878cc461a8029911"/>
    <add key="UseCustomServiceThrottling" value="false"/>
    <add key="MaxConcurrentSessions" value="100"/>
    <add key="MaxConcurrentCalls" value="32"/>
    <add key="MaxConcurrentInstances" value="132"/>
  </appSettings>
</configuration>
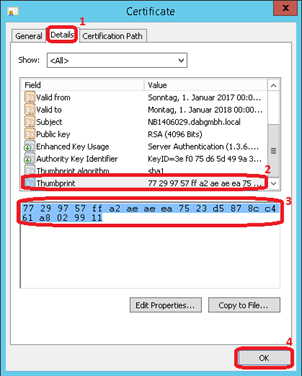
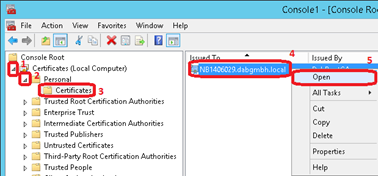
Obtain Thumbprint of certificate
In the Microsoft Management Console add the certificate snap-in for the Local Computer. Then open the Certificates and Personal node and select Certificates. On the middle screen right click on the server certificate and select Open
In the certificate window select the Details tab, scroll down Thumbprint and select it. The complete thumbprint is shown in the box below and can be copied to the clipboard.