Analytics Exchange
Analytic Exchange
Deployment dabAx.war
In the setup of the dab:Exporter is a file which is called dabAx.war. This file has to be deployed on the application server of Analytic Exchange.
You have to copy the file and paste it into the deploy directory.
- Standard directory for Analytic Exchange 5.0: C:\ACL\App\geronimo\deploy
- Standard directory for Analytic Exchange 5.3 and up: C:\ACL\App\Tomcat\webapps
After the file was pasted, you can check the deployment with the following URL:
https://name_of_servers/dabAx/VersionWebservice?wsdl
Data directory share
The dab:Exporter windows-service-user needs Read- and Write permissions in the data directory of Analytic Exchange.
Standard Directory: C:\ACL\Data\repository\datafiles
Certificates of Analytic Exchange
Mozilla Firefox
The certificates of Analytic Exchange has to be imported as trusted root certification authorities list.
In a first step you have to call your server under the following address: https://[servername]/aclax
After you have confirmed the input by pressing the enter-key, the following message will appear.

There you click on the button Advanced and then on Add Exception.
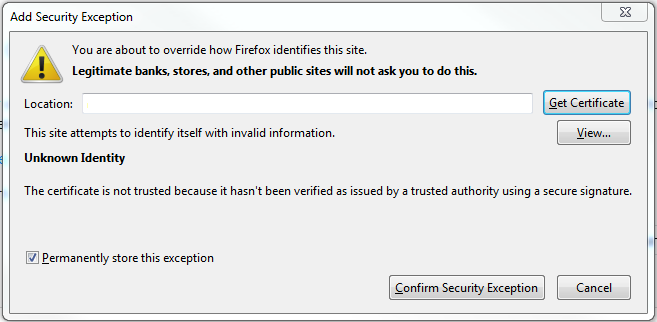
The certificate will be added by clicking the button Confirm Security Exception and you get redirected to the login screen for the ACL AX Webclient.
Google Chrome
The certificates of Analytic Exchange has to be imported as trusted root certification authorities list.
In a first step you have to call your server under the following address: https://[servername]/aclax
After you have confirmed the input by pressing the enter-key, the following message will appear.

There you click on the button Advanced and select Proceed to SERVERNAME (unsafe).
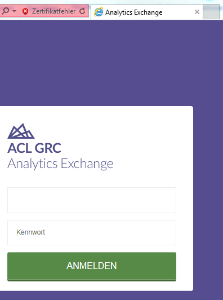
Now you are on the login page for the Analytic Exchange Webclient.
The next step is to download the certificate. Therefor you click on Not secure in the address bar and choose Certificate (Invalid)
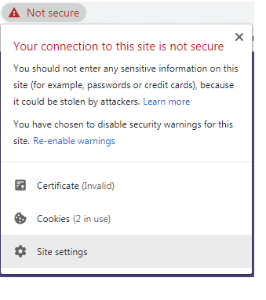
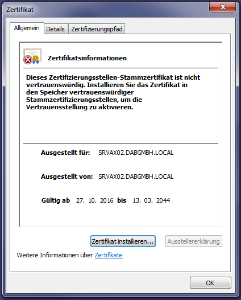
After you've clicked on invalid, another window will open.
There you have to choose the register details and then click on copy into file.
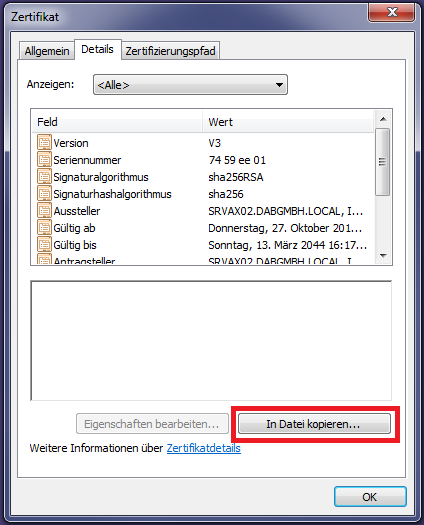
There you have to follow the instructions of the Certificationexport-assistent and save the certificate on your device.
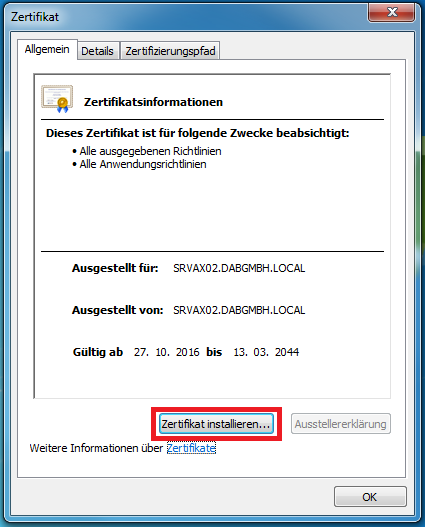
After that you choose the directory where you've saved the exported certificate and start it.
In the following windows you have to click on Install certificate and follow the instructions of the certificationimport-assistent.
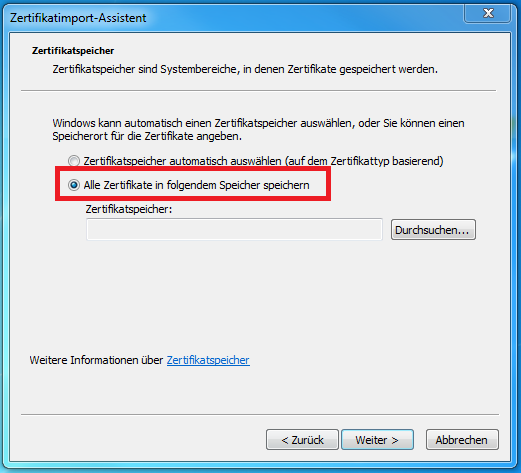
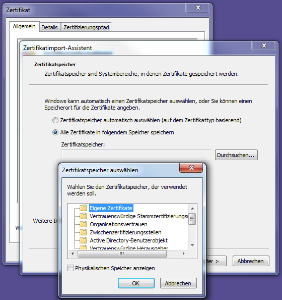
In the next Windows you select Save all certificates in the storage and then you click on Browse.
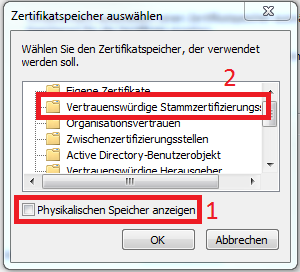
There you set the hook at Show physical memory.
Now you click on the plus icon beside trusted root certification authorities list and there you choose Local Computer.
Internet Explorer
The certificates of Analytic Exchange has to be imported as trusted root certification authorities list.
In a first step you have to call your server under the following address: https://[servername]/aclax
After you have confirmed the input by pressing the enter-key, the following message will appear.
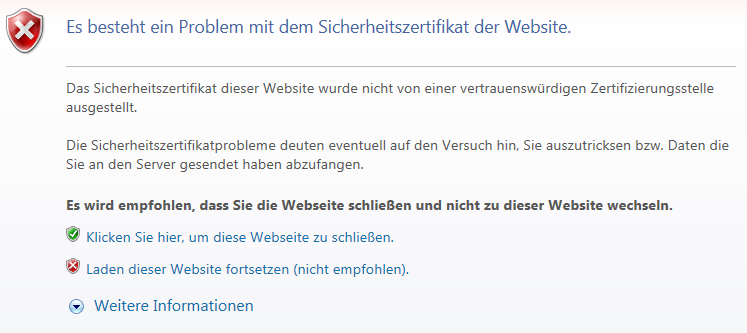
Here you click on Continue loading this website (not recommended).
This will redirect you to the login screen of the Analytic Exchange Webclient.
Now you have to click on Certificate Error in the address bar and choose Show certificate.
A click on Install certificate will start the certificate-import-assistent.
In the first step you can click on Next.
Choose Save all certificates in the following store and click on Browse.
Choose Trusted root certification authorities list and confirm by clicking on OK.
You can finish the installation by clicking on the button Finish.
You will be asked, if you want to install the certificate. Confirm with Yes.
A message is shown which informs you that the import process was succesful.
You have to restart the internet explorer to get the changes active.
If you open the page, the message about the certificate error does not appear again.

Oracle Database Driver
If the Analytic Exchange is running with the Oracle database, then you have to install the ODP.NET Driver where the dab:Exporter Server has been installed and configured.
http://www.oracle.com/technetwork/topics/dotnet
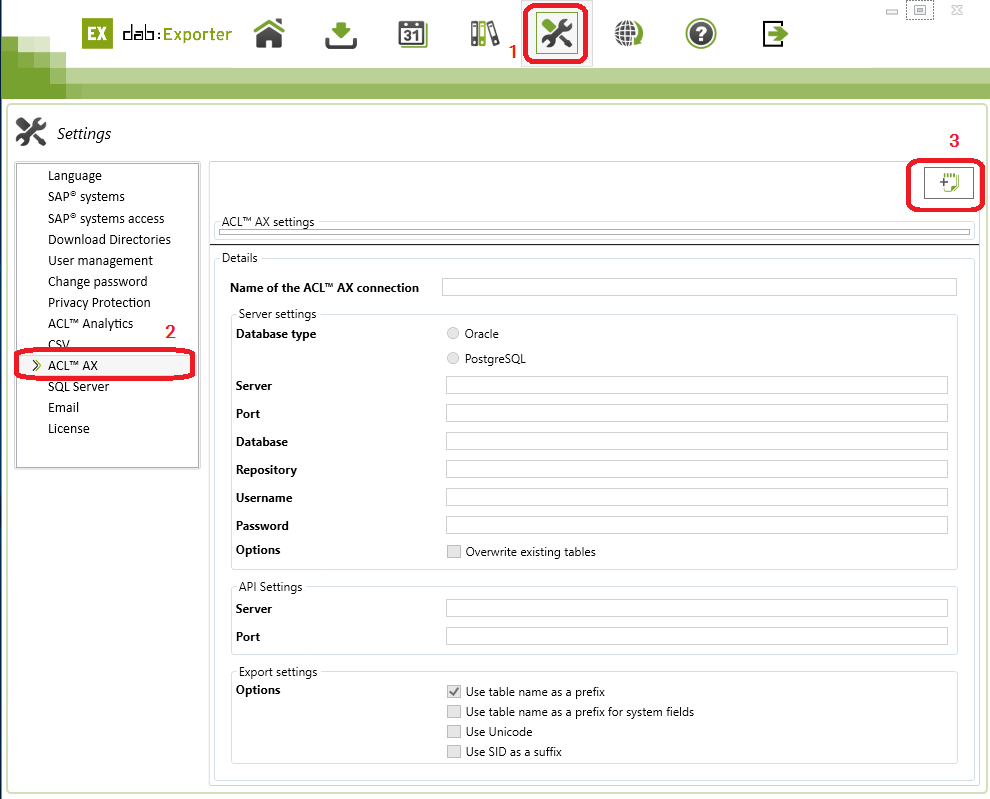
ACL AX Server Settings
It is shown how you can add the ACL AX Server to dab:Exporter.
You have to fill all fields, before you can check and/or save the connection.
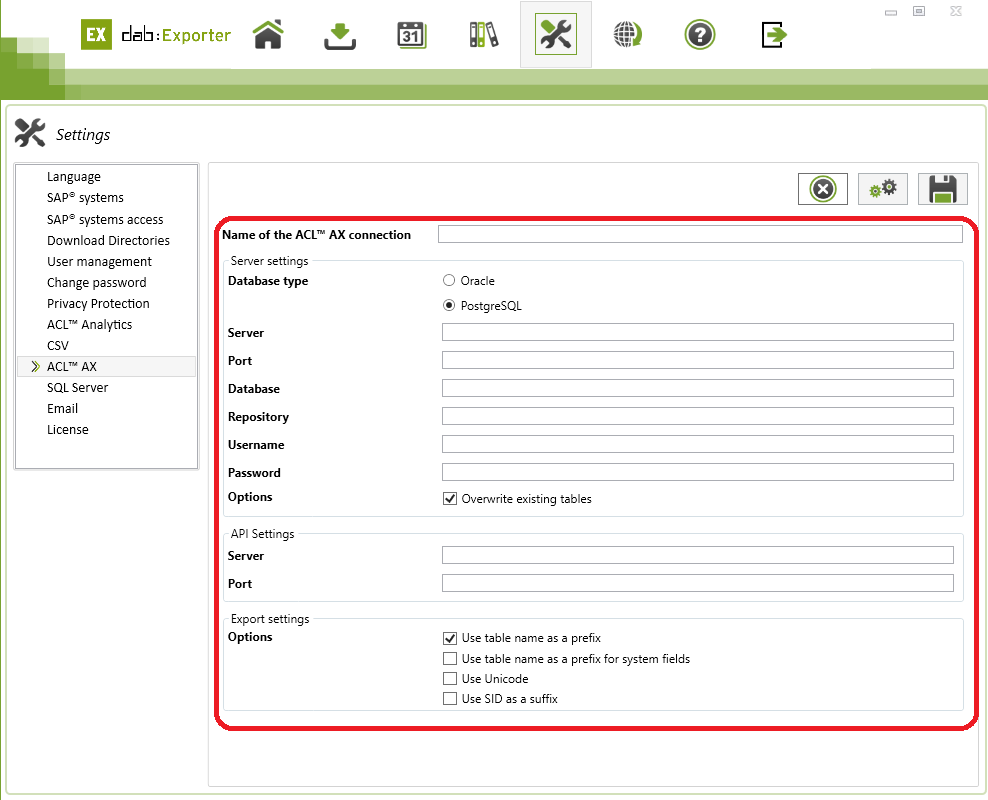
Server Settings
You can choose between an Oracle or a PostgreSQL-Database, depending on which one you use.
You can type in the IP address of your server or you type in the server name which you use.
The value of the field database is predefined as AclAuditExchangeDB. If you have changed the value, you have to change it here as well.
The value of the field username is predefined too. The value is set to AclAuditExchangeRole. If you have changed the value, you have to change it here too.
The password has to be set to the value which you use within your database.
Description | Settings |
Name of the ACL AX Connection | <Type in the name of the connection> |
Database Type | Oracle PostgreSQL |
Server | <Server address of the AX Installation> |
Port | 5432 |
Database | <Name of the database> |
Memory Location | <Enabled Folder> |
Username | <Databaseuser, who access the database with the AX> |
Password | <Password of the User> |
Driver | PostgreSQL Unicode |
Options | Overwrite existing table |
API Settings
First you have to type in the server. You can choose between the IP and the server name.
As last setting you have to type in the port.
API Settings | |
Server | <Server-Address of the AX Installation> |
Port | 443 |
Export Settings
Export | |
Options | Use table name as prefix Use table name as a prefix for system fields Use Unicode Use SID as a suffix |