Add a new SAP® System
Add a new SAP® System
It will be shown how you can add a new SAP® System in the dab:Exporter.
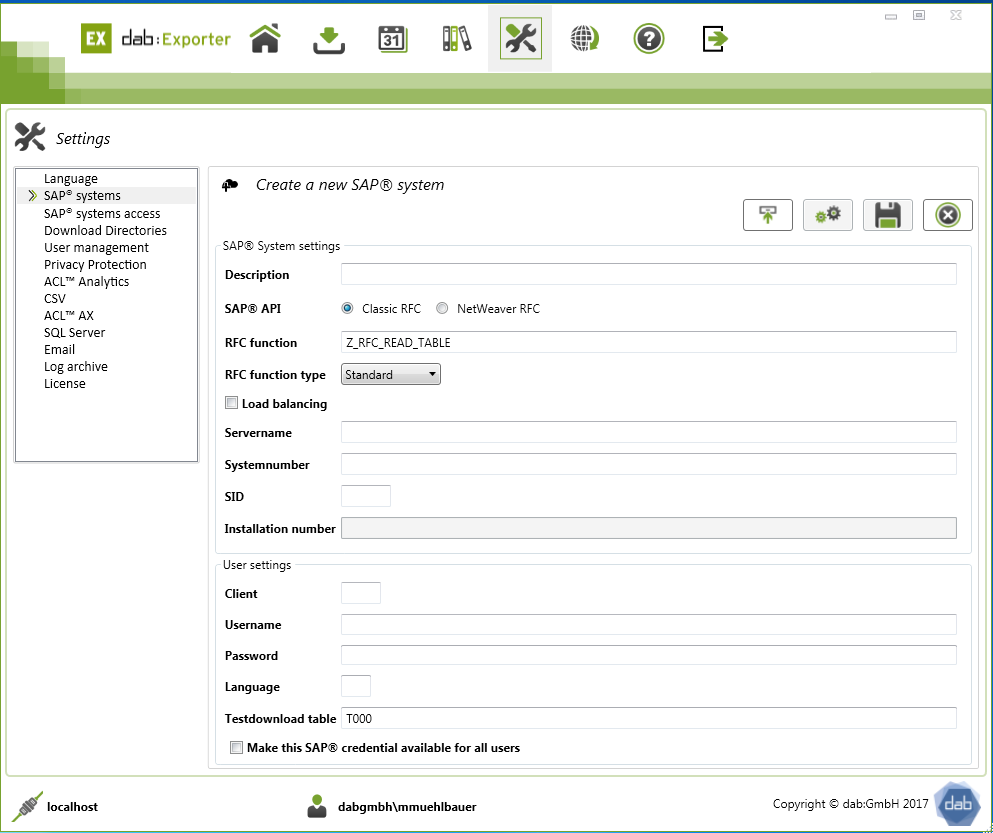
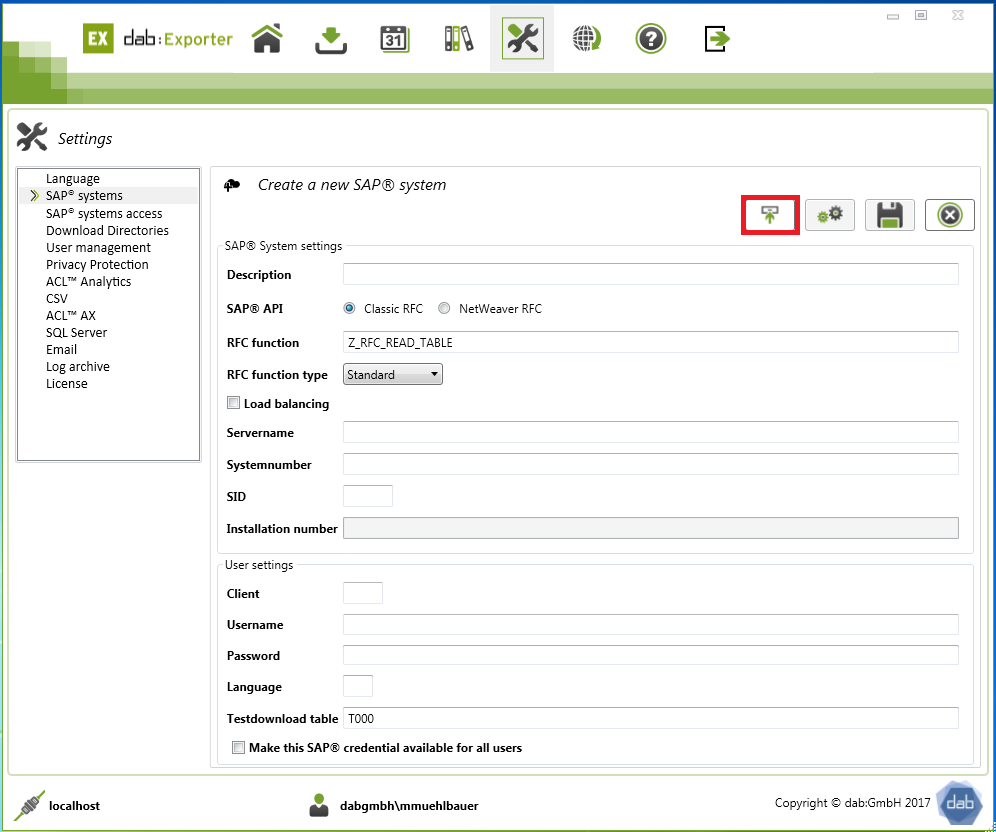
SAP® System settings
First you can type in a description for your SAP® System.
Now you have to choose between the Classic RFC and the NetWeaver RFC.
The Support of SAP® for the Classic RFC has been closed in 2016, but it is still available in all SAP® kernel version, as well as in SAP® S/4Hana ( http://www.synactive.com/tips/tip_rfc_1.html).
The RFC function has a predefined value.
Requirements for the SAP connection
The connection types "CLASSIC_RFC" and "Netweaver_RFC" depend on the respective version of the SAP GUI:
SAP GUI up to version 740 --> ClassicRFC
SAP GUI from version 750 --> NetweaverRFC
The function module "/DABEXP/RFC_SAPCONNECTOR" is the new version of the SAP connection. You must therefore select "CERT" as the function type.
The function module "Z_RFC_READ_TABLE" is an old version of the SAP connection. There are 2 different function types: Standard/Extended.
You can choose between Standard, Extended and Cert. The predefined value is set to Standard.
Standard
The predefined value of the RFC function type is standard.
Extended
You should only choose Extended if you have installed the Extended RFC. Since this RFC has a table DATA, which has the data element CHAR8000.
If this data element does not exist, the download of tables with a total length exceeding 2048 bytes will fail.
Cert
Cert is the certified building block. This option must be used if the SAR file has been installed in the SAP® system.
If you set the hook at Load Balancing, then the name of the fields Servername and Systemnumber will be changed in Messageserver and Logongroup.
This depends on if you are connected directly to the server or if you are connected over a messageserver.
You can find the necessary information for the Servername, Systemnumber and SID, when you open your SAP® Logon and you right click on the wanted connection.
Now a new window is opened, there you choose the Settings.
The servername is the application server, systemnumber is the instancenumber and the SID is the System-ID from SAP® Logon.
User settings
In the user settings you have to type in the used Client, the Username, the password and the language.
A testdownload checks if the connection is available . For this testdownload the table T000 is chosen.
But you can choose any table you want.
You can make this SAP® credentials available for all users by setting the hook at the last option.
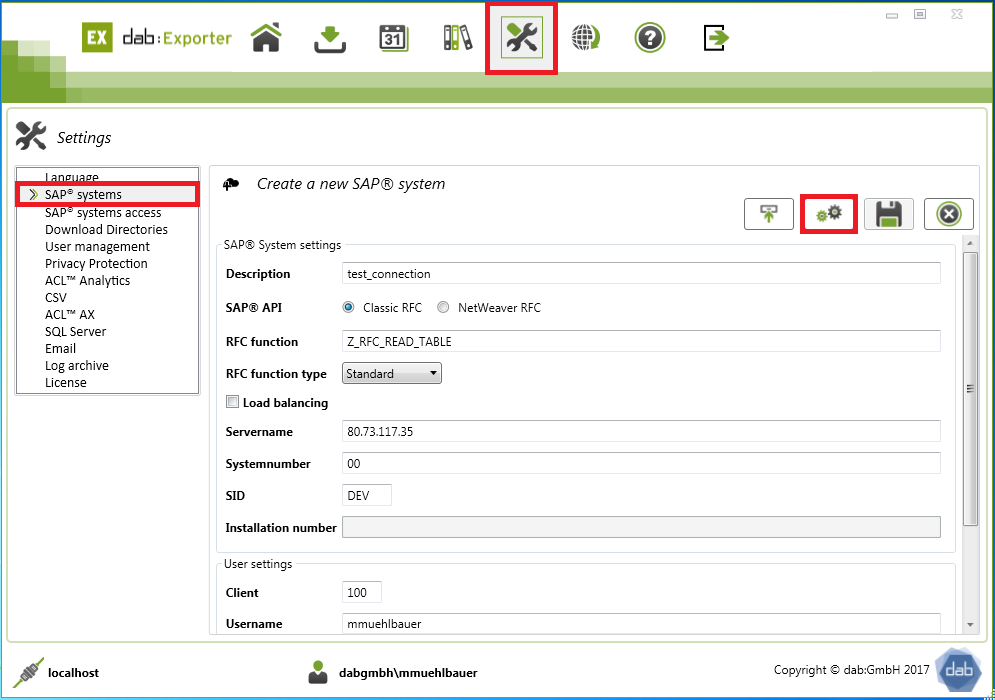
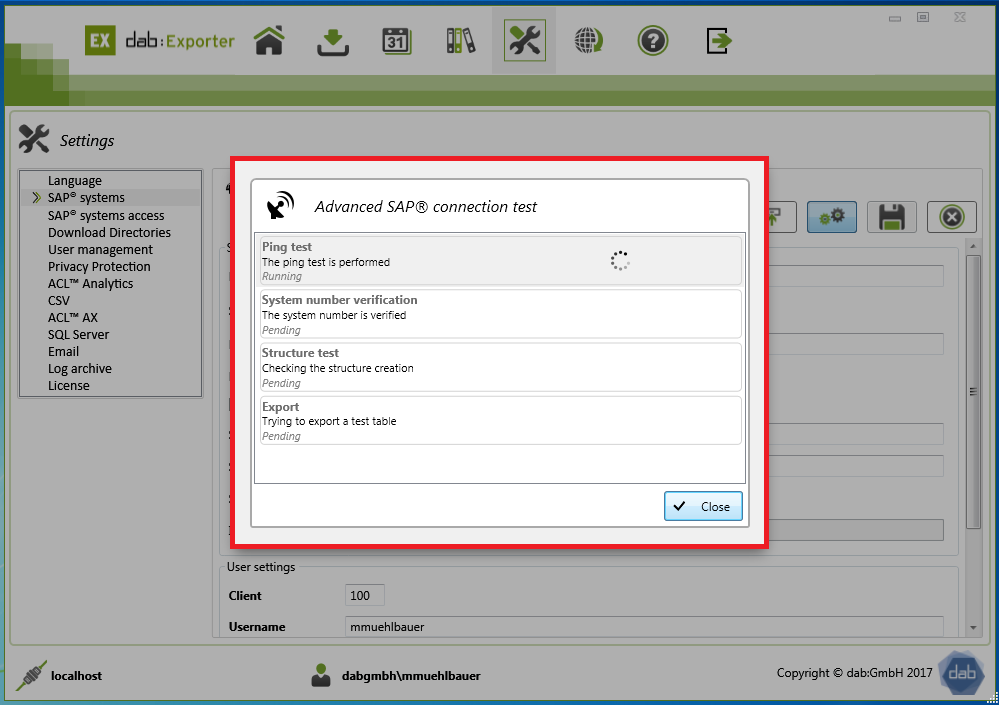
Checking the SAP® System connection
After you've done all your inputs, you have to check the connection for its availability.
Import SAP® Logon Data
You don't have to type in your SAP® Logon Data by hand.
Therefore you can load the saplogon.ini.
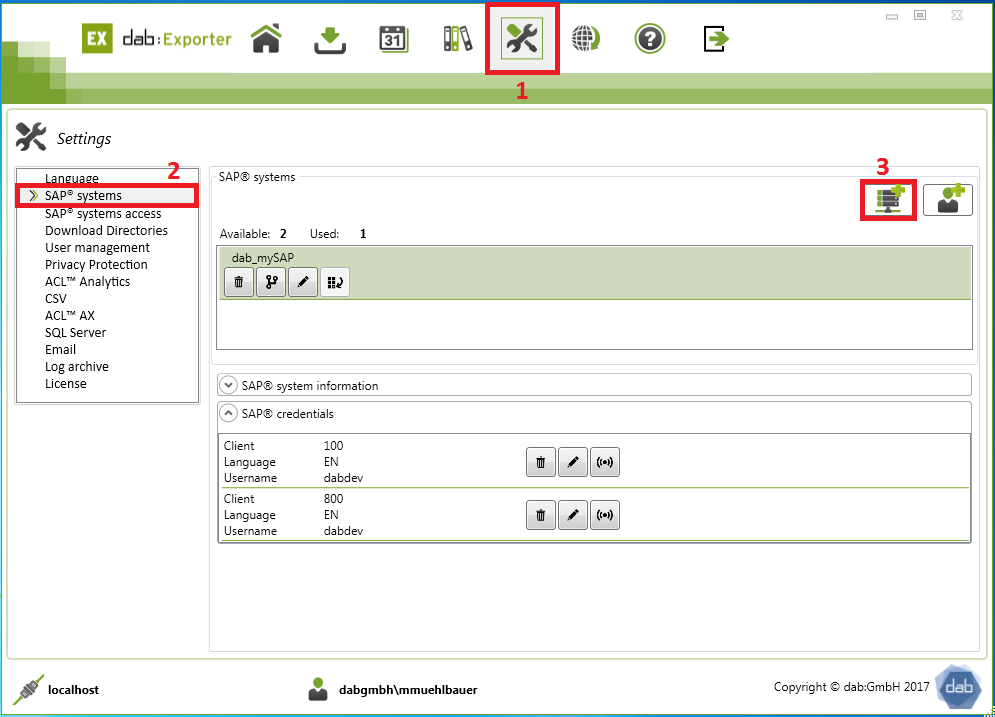
You have to switch to SAP® systems in the Settings.
There you click on the first symbol in the right corner.
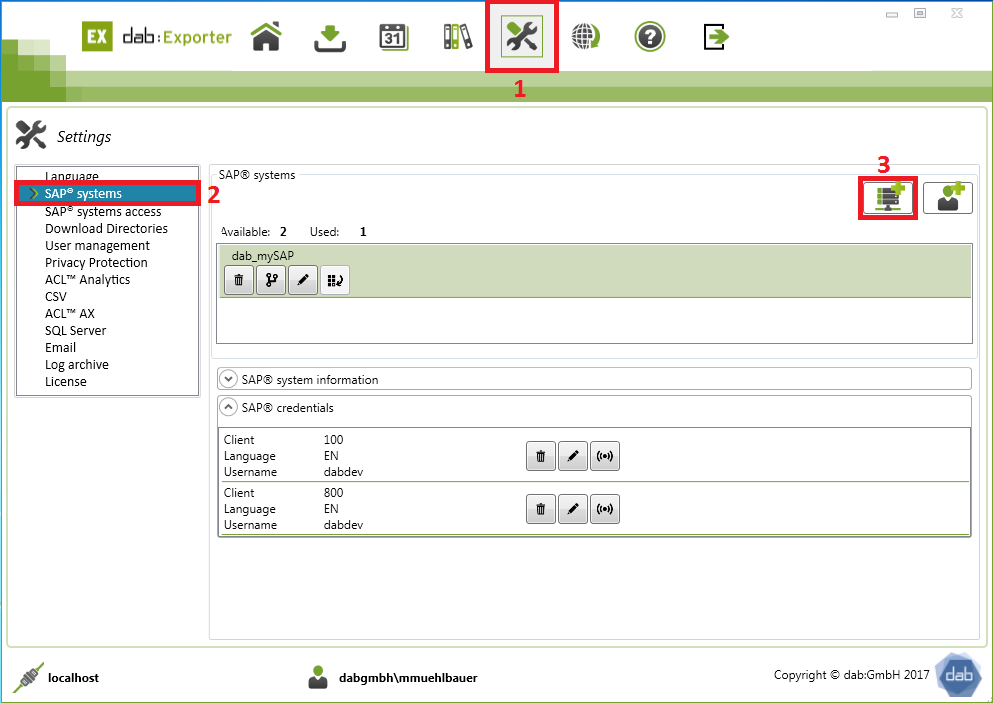
After you clicked on the marked smybol in the screenshot above, a new window will be opened.
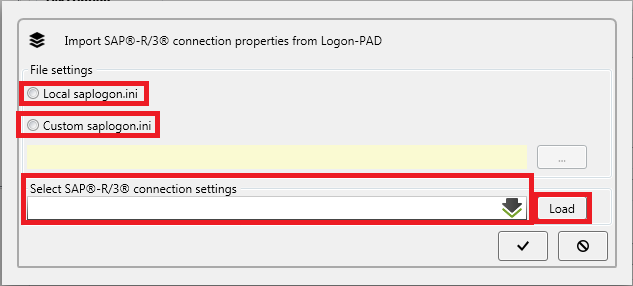
In this new window you can choose if you want to load the local or a custom saplogon.ini.
Load local saplogon.ini
If you choose the local saplogon.ini, the dab:Exporter automatically sets the path to that file.
The path will be shown in the yellow field and you have to click on the button Load.
Now all available connections within the SAP® system are shown in the field Select SAP®-R/3® connection settings.
You can select the prefered connection then.
Load custom saplogon.ini
You can also use a custom saplogon.ini.
Therefore you have to choose Custom saplogon.ini first.
Now you have to set the path for the file. Click on the button with the three points.
Set the path to the file now and click on the button Open.
After the path is set, you click on the button Load.
Now all available connections within the SAP® system are shown in the field Select SAP®-R/3® connection settings.
You can select the prefered connection then.